

Brown Leaf Tips on Houseplants: Causes and What to Do
Brown leaf tips are patches of dead leaf tissue. They can appear when roots become too dry, when the pot stays wet for too long, after salts build up around the roots, or after sudden changes in temperature, light or airflow. Damage to the leaf itself can also leave a brown edge. Some plants are especially sensitive to certain minerals in water or to particular nutrient problems.
The brown tip alone rarely tells you what caused it. Look at whether the damage is still spreading, what changed before it appeared, how the pot and roots behave, and whether the plant has any other symptoms.
Several stresses can happen at the same time. A plant may have dried severely while fertiliser salts were building up, or arrive with transport damage and then face a sudden change in light or temperature.
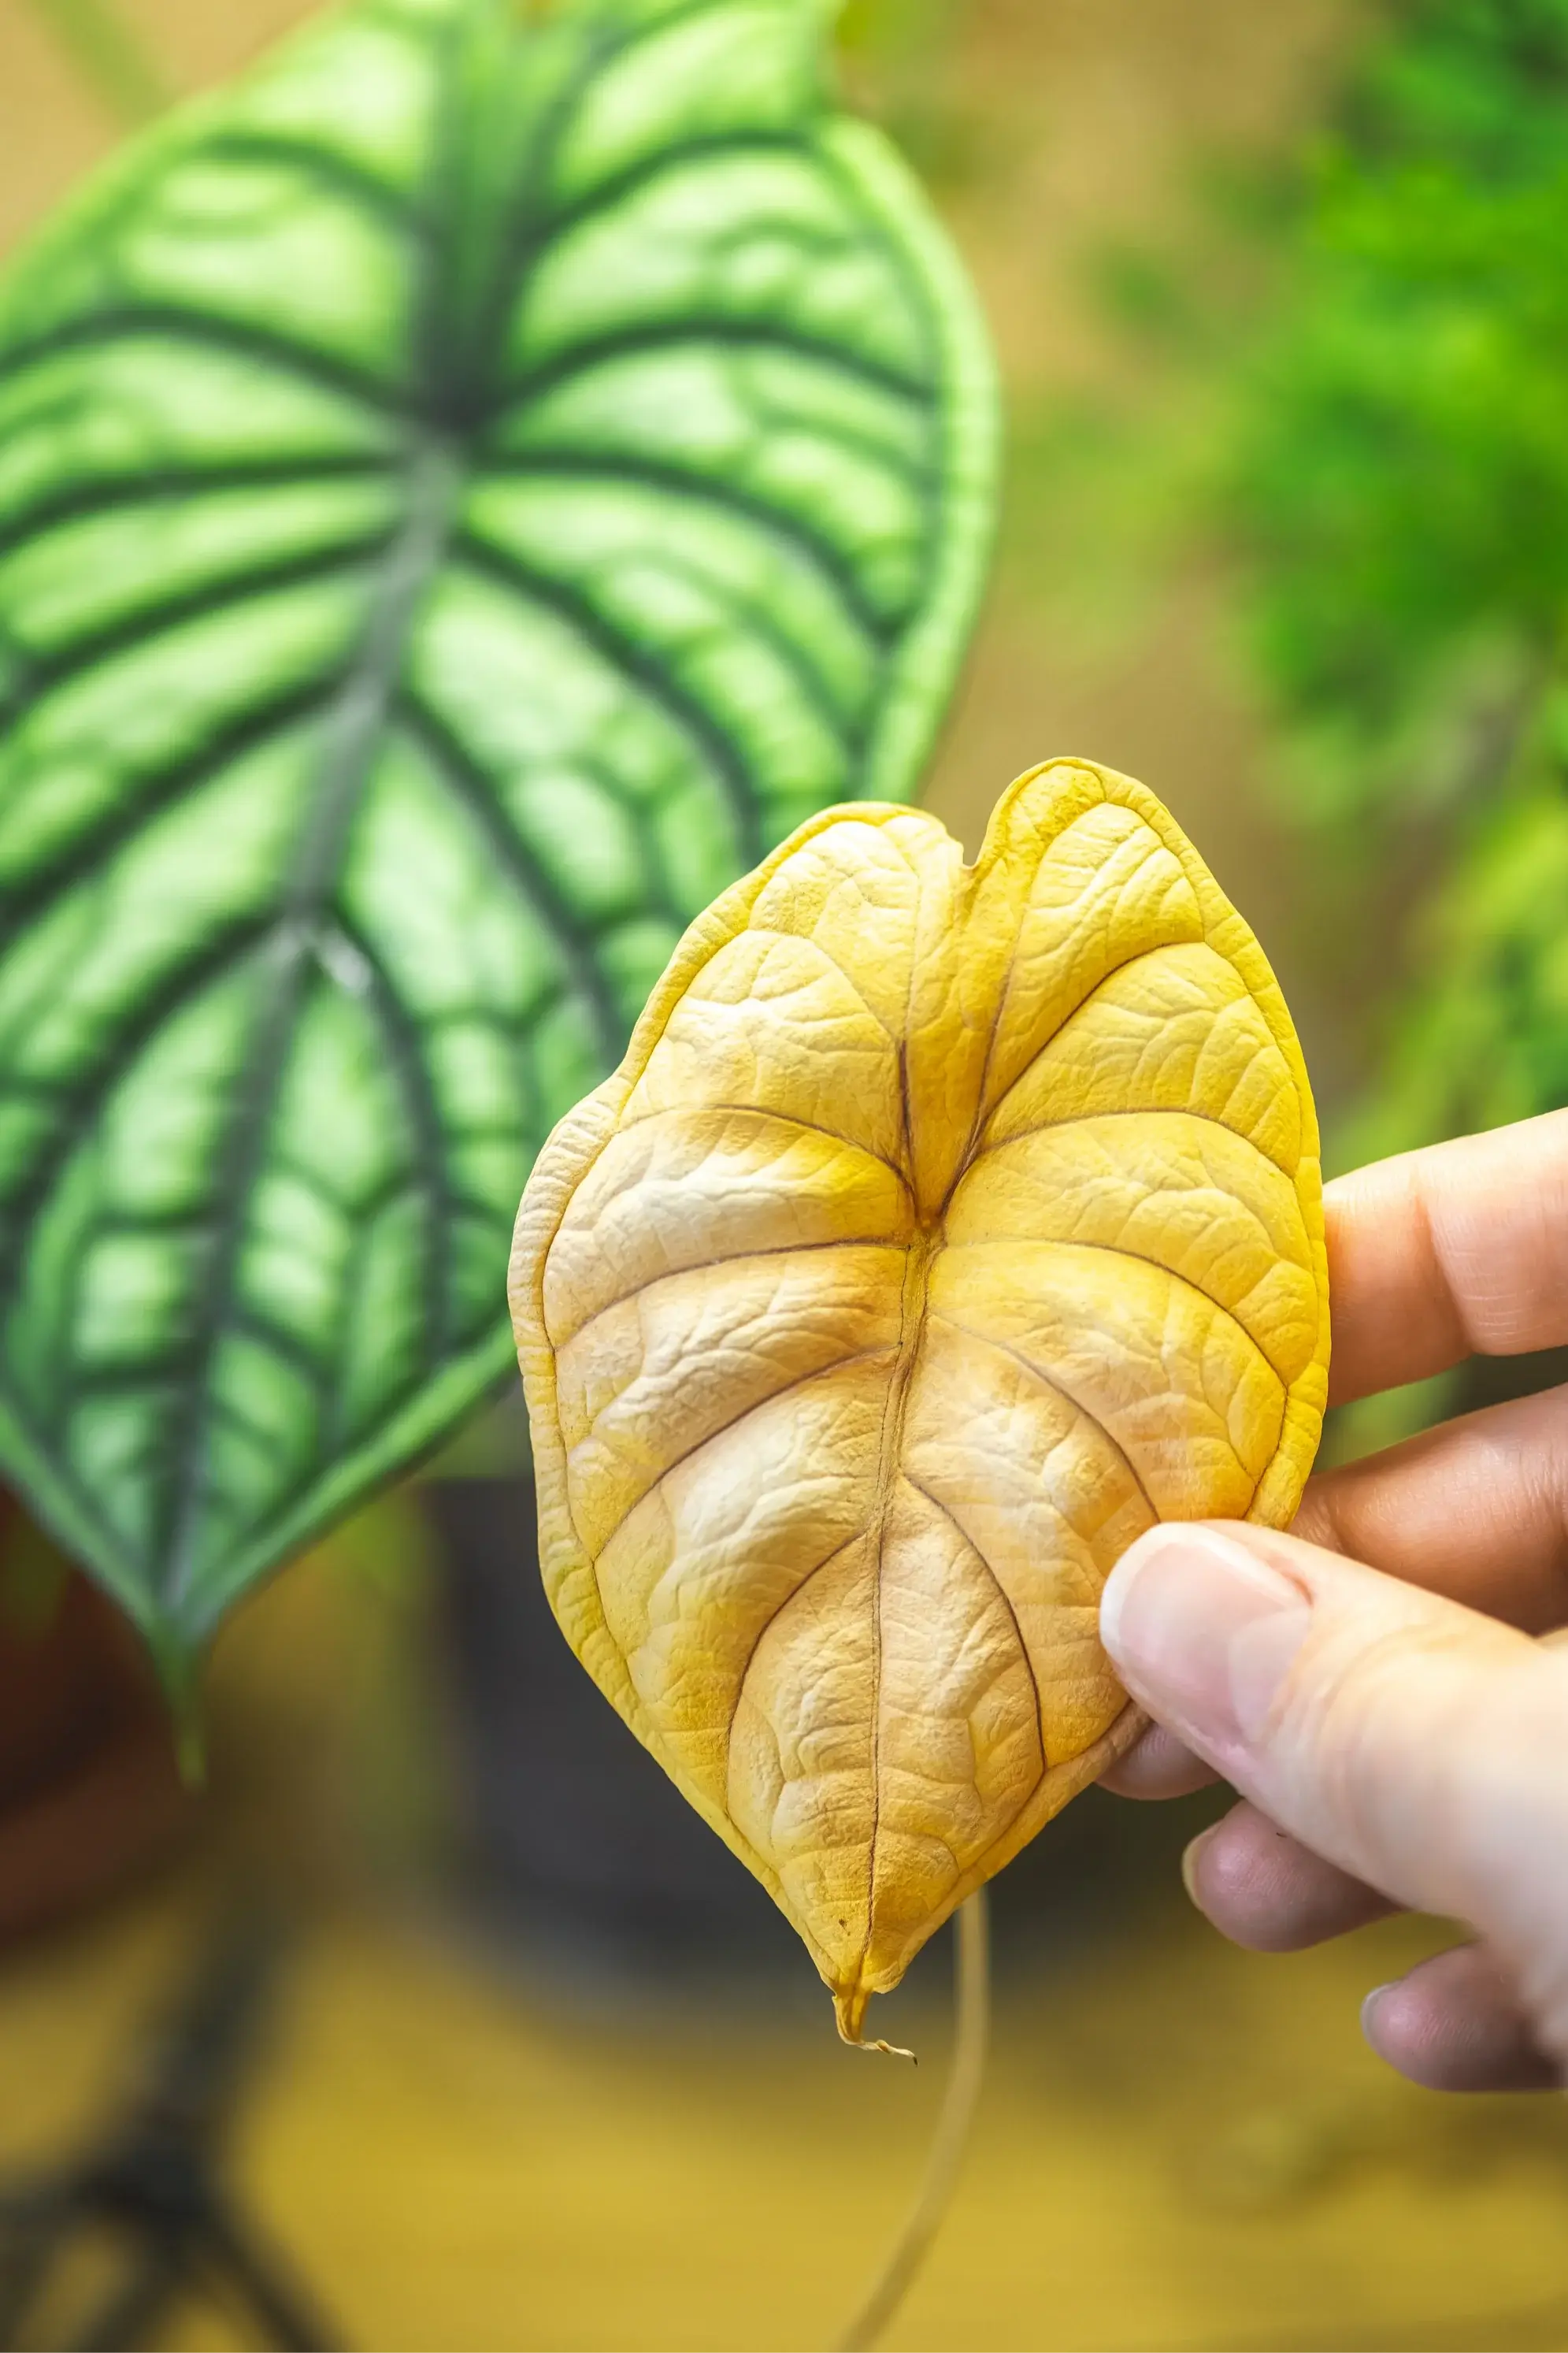
The brown tissue itself will stay brown. Recovery means the damage stops spreading and healthy foliage stays healthy.

Is the damage still spreading?
Start by working out whether you are looking at old damage or a problem that is still active.
A dry brown tip may remain visible long after the original stress has passed. Take a clear photo of the affected leaf and note the date so you have something to compare later.
The damage has probably stabilised when:
- the boundary between green and brown tissue stays in the same place;
- leaves that were previously healthy remain unchanged;
- no new brown tips appear;
- the rest of the plant looks healthy.
Look more closely when:
- the brown area keeps getting larger;
- additional leaves develop brown tips;
- previously healthy leaves become affected;
- new growth develops damage;
- the plant is declining more generally.
Could it simply be an ageing leaf?
Houseplants naturally shed older foliage.
Normal ageing is likely when one of the oldest leaves gradually yellows and dies while the rest of the plant remains healthy and later growth looks normal.
A brown tip on an older leaf can also be left over from an earlier period of stress. Repeated damage across several otherwise green leaves suggests that something is still affecting the plant.
The cause may have happened several days ago
Leaf damage can become visible after the event that caused it.
Think back to:
- delivery or cold transport;
- a move to another room or window;
- repotting;
- a period when the root ball became severely dry;
- sudden stronger sunlight or heat;
- a recent treatment applied to the leaves.
A plant can look fine when it arrives and develop more visible damage over the following days.

When the damage needs a closer look
Some symptoms suggest that the brown tip is part of a wider problem.
Pay closer attention when you see:
- soft or mushy tissue;
- water-soaked areas;
- damaged areas that expand quickly;
- separate spots appearing across a leaf;
- strong yellowing around dead tissue;
- damage spreading into the leaf stalk, stem or centre of the plant;
- fine pale speckling, webbing, silvery patches or visible pests.
Pests, disease, cold damage and products used on the leaves can all cause brown tissue together with signs like these.
If the tip is dry and stable and the plant otherwise looks healthy, monitoring may be enough.
What changed before the brown tips appeared?
Think back over the days or weeks before the damage became noticeable.
Start with recent changes, then look at the leaf for extra clues.
- Watering or roots: severe drying, a new watering pattern or repotting.
- Delivery or environment: shipping, temperature, position, direct light, heating or airflow.
- Fertilising or water: fertiliser strength, how often you fertilise, water source or household water treatment.
- Products used on the leaves: insecticide, soap, oil, fertiliser sprayed onto the leaves, cleaner or polish.
- Growing method: a move into or out of LECA, PON, passive hydro or a self-watering pot.
The timing matters because leaf damage can appear after the original stress has ended.
What should you check first?
| What you notice | What may be happening | What to check |
|---|---|---|
| The root ball repeatedly becomes very dry or the pot feels unusually light | The roots may not be getting enough water | Check moisture through the whole root ball |
| Water rushes through or around a very dry root ball | Parts of the potting mix may still be dry | Check whether the centre becomes moist |
| The pot stays wet much longer than it used to | The roots may be getting too little air, or the plant may now be using less water | Check drainage, light, pot size and potting mix |
| Damage began after repotting | The roots may have been disturbed, or the new pot may hold water differently | Check how quickly and evenly the new pot dries |
| Damage appeared after delivery, cold transport or moving the plant | Cold, rubbing during transport or a sudden change in surroundings may be involved | Think back over the preceding several days |
| Damage followed stronger light, heat or airflow | That part of the plant may now be getting stronger sun, heat or dry airflow | Check what changed around that side of the plant |
| Damage appeared after you increased the fertiliser strength or started fertilising more often | Fertiliser salts may have built up | Check how much fertiliser you use, how often you use it and whether excess water drains away |
| Pale deposits appear together with frequent fertilising or mineral-rich water | Salts or minerals may be building up in the pot | Review the fertiliser and water you use |
| Water comes through a softener that uses sodium | Extra sodium may be reaching the roots | Check whether you have an unsoftened supply |
| Several plants develop similar damage at the same time | They may share the same water, fertiliser, heat, cold, light or airflow | Check what the affected plants have in common |
| Damage began after a spray or other leaf treatment | The product or the way it was applied may have damaged the leaf | Stop the recent product and check its label |
| Leaves also show fine pale speckling, silvery patches, webbing, distortion or visible insects | A pest may be involved | Inspect the plant closely and identify the pest |
| The damaged areas are wet, soft or spreading, or new spots keep appearing | Cold damage, a leaf treatment or disease may be involved | Look at what else is happening on the leaf and the rest of the plant |
Check what is happening around roots in ordinary potting mix
Both severe drying and prolonged wetness can leave a plant struggling to supply its leaves with water.

When the root ball has become too dry
Brown tips can appear after the root ball becomes severely dry, especially when this happens repeatedly.
Check moisture beyond the surface. The top of the potting mix may feel damp while the centre remains dry, or the surface may dry while moisture is still available deeper in the pot.
A badly dried organic potting mix can also become difficult to wet evenly. Water may run through cracks or down the sides while dry areas remain inside the root ball.
Possible clues include:
- the pot becomes very light soon after watering;
- the root ball has pulled slightly away from the pot wall;
- water immediately runs down the sides;
- water exits through the drainage holes unusually quickly;
- the centre still feels dry after watering.
When the whole root ball is dry, water it slowly and evenly in several rounds, giving the potting mix time to absorb the water.
A short soak can help a badly dried root ball that resists rewetting. Let the pot drain completely afterwards.
Once the root ball is evenly moist again, use its drying speed to decide when to water next. Repeated swings between severe dryness and saturation keep putting the roots under stress.
For a fuller method, see our houseplant watering guide.
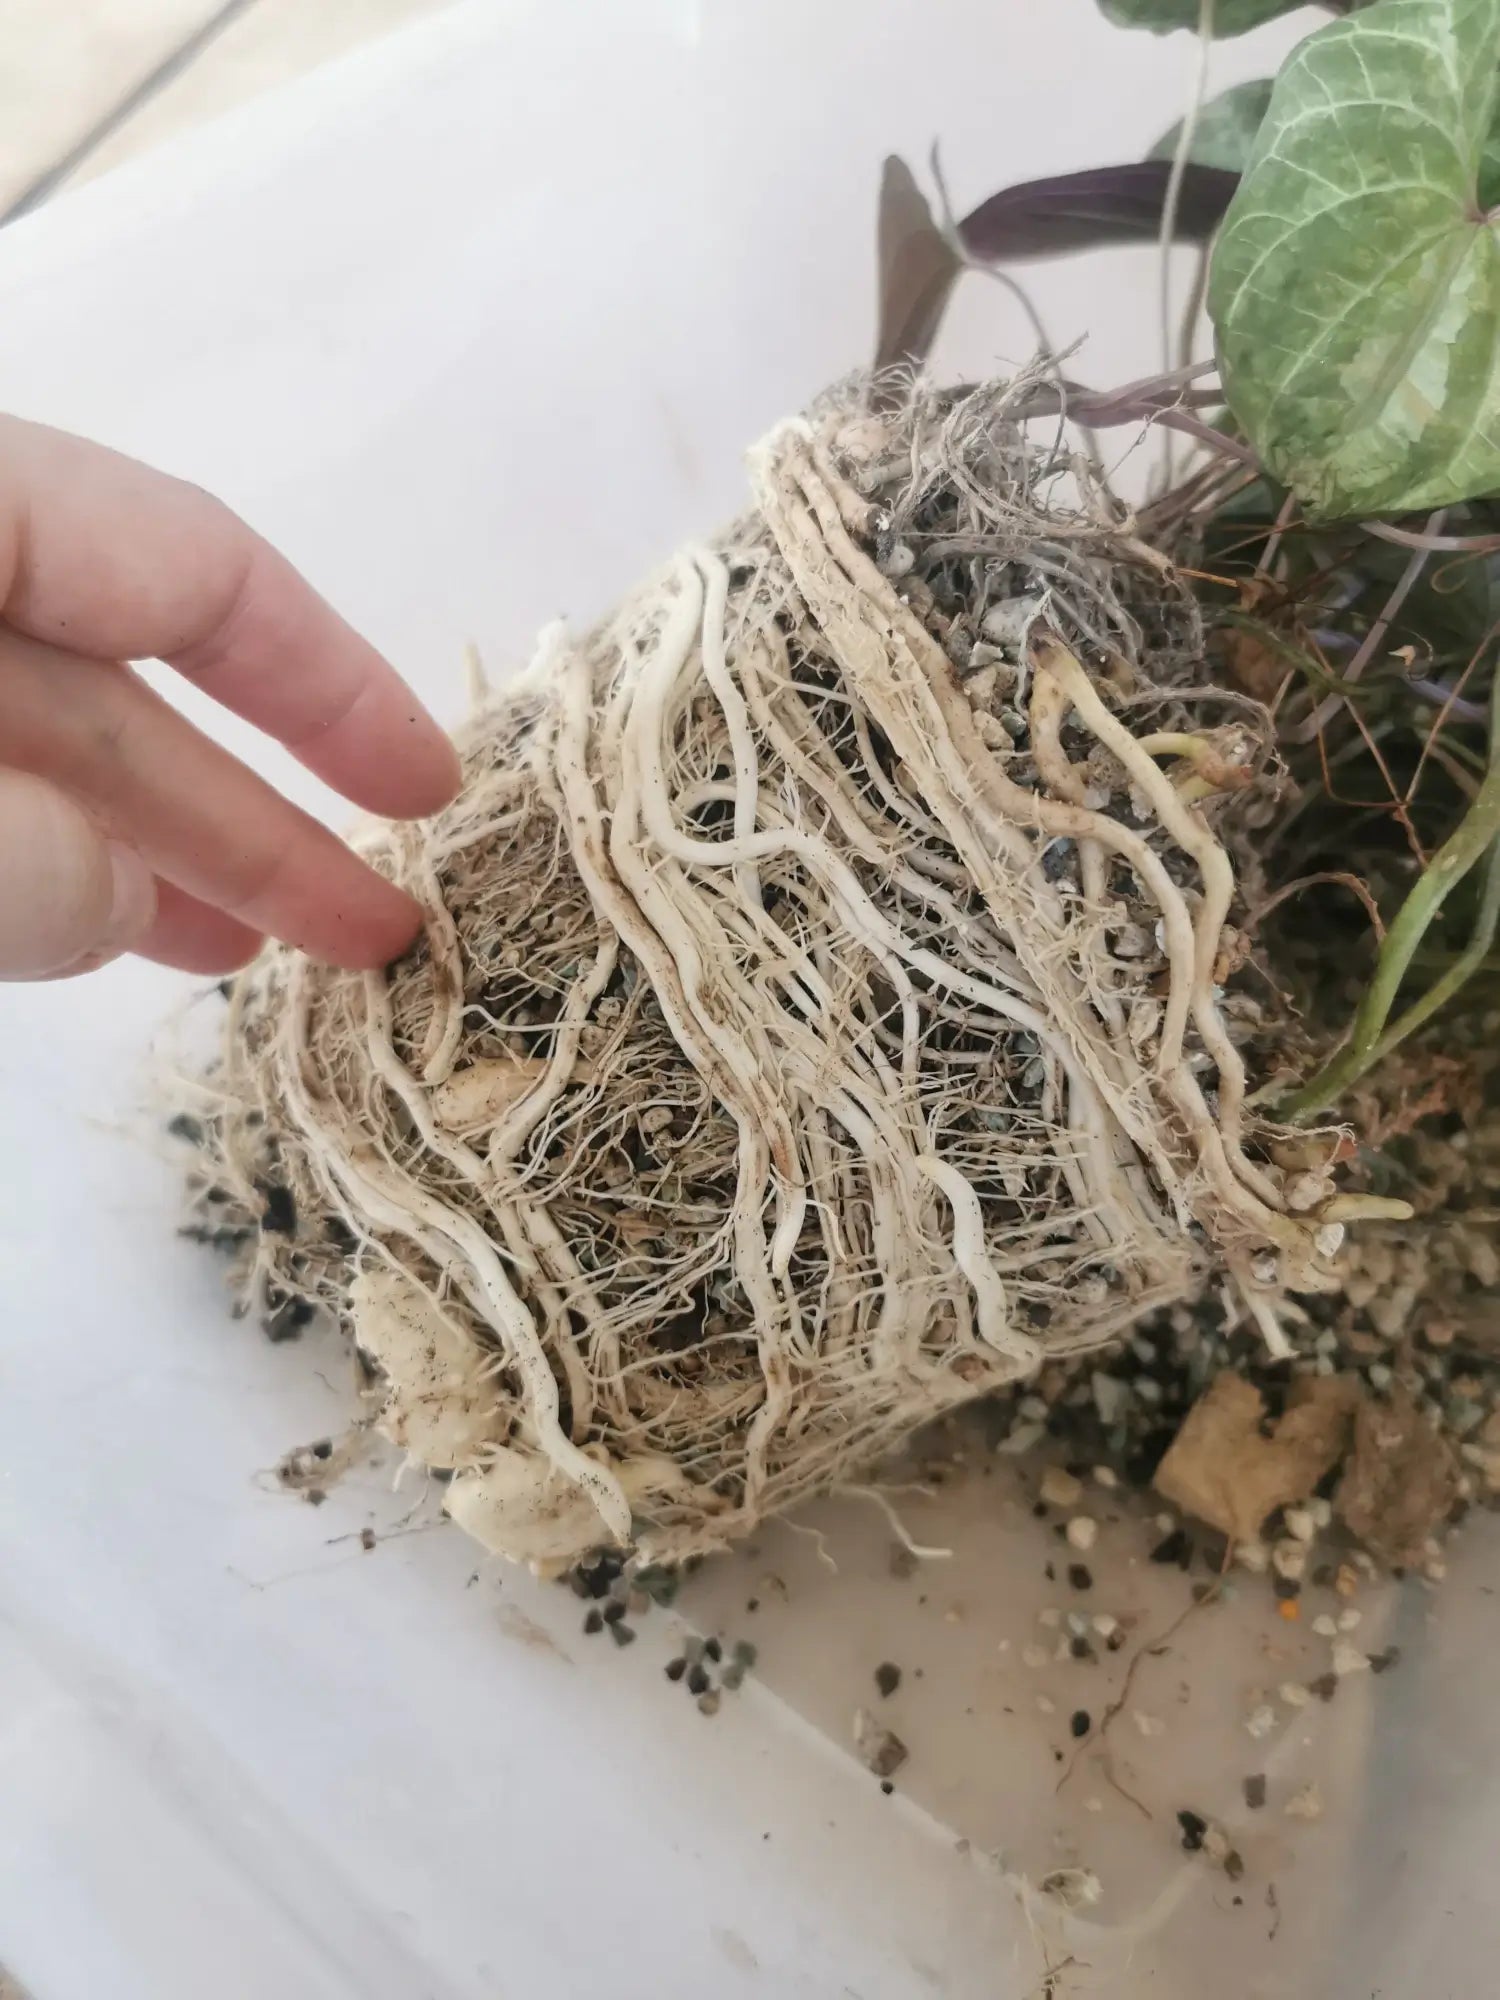
When a crowded root system changes watering
A pot packed with roots may dry much faster because relatively little potting mix remains to hold water.
Water can also move through the root ball unevenly.
Look for several clues together:
- roots occupy much of the root ball;
- the plant becomes thirsty unusually soon after a thorough watering;
- little potting mix remains between the roots;
- water struggles to penetrate evenly.
Treat roots at one drainage hole as one clue. Check the whole root ball and how quickly the pot dries.
When the pot is packed with roots and dries so quickly that keeping it evenly watered becomes difficult, move the plant into a suitably larger container.
When the pot stays wet for too long
Roots need both water and air.
When potting mix stays saturated, much of the air space around the roots fills with water. The roots can then stop working properly, and the plant may wilt or develop dry-looking foliage even though the pot is still wet.
If the pot suddenly takes much longer to dry, look for a reason. Water may be collecting in an outer pot, the plant may be receiving less light, or the potting mix may simply hold more water than before.
Common causes include:
- water collecting inside a decorative outer pot;
- blocked drainage;
- a move into lower light;
- cooler conditions or slower growth;
- a pot much larger than the root system;
- dense potting mix that holds water for a long time;
- old mix that has broken down and become compact;
- recent repotting into a mix that holds much more water.
Empty standing water, unblock drainage holes, or adjust the potting mix when one of these is keeping the roots wet.
When root rot becomes possible
Prolonged wetness can weaken roots before root-rotting diseases take hold.
Root rot becomes more likely when the plant keeps declining and the roots themselves are deteriorating.
Look for:
- soft or collapsing roots;
- outer root tissue that slips away easily;
- extensive dead roots;
- damage at the base of the plant or on the stem;
- continued wilting while the root ball remains wet.
At that point, use our root rot guide for what to check and do next.
If the problem started after repotting
Repotting changes several things at once.
Roots may have been disturbed. The new potting mix may hold more or less water. A larger pot may dry more slowly.
Pay attention to how the new pot behaves. Water should reach the root ball evenly, excess water should drain freely, and the container should leave enough fresh space for roots without surrounding them with a large volume of wet potting mix.
When those things look sound, give the plant time to settle.
If the plant grows in LECA, PON, passive hydro or a reservoir pot
LECA and PON can be used in pots with or without a reservoir. Other passive-hydro systems may also use a reservoir.
Useful things to check include:
- how strong the nutrient solution is;
- the water you use;
- reservoir level, if the setup uses one;
- pH, if you monitor it in that setup;
- visible salt deposits;
- whether the roots are healthy, especially if the plant was recently moved from potting mix.
In reservoir systems, water can move upwards through the substrate and carry dissolved salts with it. Salts can then collect in parts of the pot that are rarely rinsed from above.
If you measure electrical conductivity (EC), use a reference range that matches the plant, nutrient solution and growing method.
Self-watering pots with ordinary potting mix
The usual principles still matter:
- roots need air;
- excess salts can build up;
- moisture throughout the root ball matters.
The reservoir changes how water moves through the pot. The lower part may stay consistently moist while the upper layer feels much drier.
Check moisture through the whole root ball; the surface can give a misleading picture.
Check recent changes around the plant
When the roots look healthy, recent changes around the plant are often the next useful clues.
After delivery or moving the plant
Transport can expose tropical plants to cold, drying, rubbing and sudden changes in their surroundings within a short period.
Cold damage can continue to become visible after delivery. A leaf may look fine when unpacked and develop brown or dark areas over the following days.
For a newly delivered plant with stable damage, keep light, temperature and watering steady while you watch whether the damage stops spreading.
Cold and chilling
Tropical houseplants can suffer cold damage at temperatures well above freezing. Sensitivity varies between plants and also depends on how long the cold lasts.
Possible situations include:
- a cold delivery journey;
- time spent in an unheated vehicle or loading area;
- leaves touching very cold glass;
- repeated cold air from an exterior door;
- cold air blowing from a vent.
Cold damage can leave dry brown or black areas. Some plants first develop water-soaked patches.
If cold damage seems possible, think about where the plant has been during the past few days.
Sudden stronger light or heat
Leaves adapted to one light level can be damaged after a sudden move into much stronger direct sun or heat.
Check for:
- a sunnier window;
- a plant moved closer to the glass;
- a change in the angle or strength of direct sun;
- a radiator;
- another strong heat source.
When one side of the plant is more affected, check what is different around that side.
Dry air and strong airflow
Dry air makes leaves lose water faster. It can contribute to dry tips and edges in humidity-sensitive plants, especially when the roots are also struggling to keep up.
Measure the room with a hygrometer when dry air seems likely.
A humidifier can raise room humidity consistently. Moving the plant away from strong dry airflow from a heater or ventilation outlet can also help.
Misting briefly raises moisture around the leaves; room humidity soon returns to its previous level.
Humidity needs vary between houseplants, so base humidity care on the plant you are growing.
See our houseplant humidity guide for practical humidity advice.

Sprays, soaps, oils and other products used on the leaves
Think about anything that touched the foliage shortly before the damage appeared.
Possible sources include:
- insecticidal soap;
- horticultural oil;
- pesticide sprays;
- fertiliser sprayed onto the leaves;
- household washing-up liquid;
- cleaning products;
- leaf-polishing products.
Plant sensitivity varies. Mixtures that are too strong, repeated applications and hot conditions can increase the risk of leaf damage.
If the timing fits, stop the recently introduced product and check its label before using it again.
Household washing-up liquid contains a mixture of ingredients that can affect leaves unpredictably.
Mechanical damage
A torn, creased or rubbed section of leaf often dries brown afterwards.
Common causes include:
- rubbing against a wall or shelf;
- leaves caught against another object;
- folding or crushing during transport;
- torn tissue;
- repeated contact with nearby surfaces.

Physical damage usually follows the shape of the original injury and stays stable once the damaged tissue dries.
Water droplets in direct sun
Plain water droplets are often blamed for scorching houseplants in sunlight.
On smooth houseplant leaves, first check whether sun exposure recently changed. Residue from products sprayed onto the leaf may also affect how it responds to strong light.
Could fertiliser or nutrients be involved?
For most brown-tip problems, check the roots and recent changes around the plant first. Check fertiliser and nutrition when the timing and other symptoms point in that direction.

Fertiliser and salt buildup
Too much fertiliser can increase the amount of dissolved salt around the roots, making it harder for the plant to take up water.
Salt buildup becomes more likely when:
- fertiliser has recently been mixed more strongly;
- you fertilise more often;
- the plant is growing slowly while receiving the same amount of fertiliser;
- little excess water ever leaves the pot;
- the water you use already contains a lot of dissolved salts;
- pale deposits repeatedly form on the pot or potting mix.
Visible pale or white residue shows that dissolved material has been left behind as water evaporates. It cannot tell you exactly which salts are present.
If recent fertilising makes salt buildup likely, pause fertilising.
If the pot drains normally, water thoroughly and let the excess drain away. This can carry some dissolved salts out of the pot.
If the pot already stays wet for too long, deal with that before trying to wash salts out.
See our houseplant fertilising guide for routine fertilising advice.
Signs that a nutrient problem may be involved
Look at the rest of the plant too.
Depending on the plant and nutrient, you may also see:
- yellowing;
- spotting;
- distorted new growth;
- damage across a larger part of the leaf;
- unusually weak growth;
- the same type of damage repeatedly appearing on leaves of a similar age.
Check which leaves are affected, whether they are yellowing or distorted, how you fertilise and the condition of the roots.
The pH of the potting mix also matters
Nutrients can be present in the potting mix while becoming easier or harder for roots to absorb as pH changes.
Water with high alkalinity can gradually raise the pH of the potting mix. Very low pH can make some elements too easy for the plant to take up.
Symptoms that look like a nutrient problem can therefore begin with what is happening around the roots, even when enough fertiliser is being supplied.
Potassium deficiency in palms
In some palms, potassium deficiency can eventually damage the tips and edges of older leaflets.
Older leaflets may also develop spotting and yellow or orange areas before the tips and edges die back.
Look at the whole palm and how it has been fertilised. Check the full pattern across older leaves before adjusting potassium.
Other nutrient problems
Calcium, magnesium, boron and manganese problems can also damage leaves, usually together with other symptoms.
- Calcium problems can affect developing leaves.
- Magnesium deficiency commonly causes broader yellowing on older leaves.
- Boron problems can damage growing points and leaf edges.
- Manganese problems vary considerably between plant groups and growing conditions.
Plants need boron in very small amounts, and excess can damage them.
Before adding a specific nutrient, look at the symptoms across the whole plant and how it has been fertilised. Choose a nutrient treatment when the wider symptom pattern supports it.
Is your water source worth investigating?
Most brown tips do not require a water analysis.
Check the water source when the problem keeps returning, several plants are affected, a household water softener is involved, or the plant is known to react strongly to certain minerals.

What hardness, alkalinity and EC tell you
Hardness mainly reflects calcium and magnesium. It can contribute to scale and pale deposits.
Alkalinity matters because repeated watering with highly alkaline water can gradually change the pH of the potting mix.
Electrical conductivity, or EC, gives a rough measure of how much dissolved salt is present.
Individual dissolved substances such as sodium, chloride, fluoride and boron can matter in sensitive plants.
Water quality includes hardness, alkalinity and individual dissolved substances.

Water softened with sodium
Many household water softeners replace calcium and magnesium with sodium.
That reduces hardness for household use while increasing the sodium reaching plant pots.
If your home uses this type of softener, an unsoftened bypass tap is a practical source for watering plants.
Naturally soft water has its own mineral profile. Water softened with sodium has passed through a softener that adds sodium.
Some plants react more strongly to certain minerals in water
Dracaena
With recurring brown tips or edges on Dracaena, check the water source and fertiliser use.
Dracaena can react to:
- high levels of dissolved salts;
- fluoride;
- boron;
- unsuitable conditions around the roots.
Start with the water you use, how you fertilise and how the potting mix behaves.
Spider plant
Fluoride can contribute to tip damage in spider plants. Boron and growing conditions can also play a role.
For recurring damage, check the water source, fertiliser use, salt buildup and root moisture together.
Goeppertia and Calathea
Recurring brown margins in Goeppertia and Calathea can involve:
- root moisture;
- fertiliser and salt buildup;
- minerals and salts in the water;
- potting-mix pH;
- room humidity.
Check the roots, fertilising, water and room humidity together.

Fluoride depends on your local water supply
Fluoride can damage sensitive plants when exposure is high enough.
If a sensitive plant keeps developing brown tips after root moisture, fertiliser and recent changes around the plant have been checked, look at your local water analysis to see whether fluoride could be contributing.
Chlorine, chloramine and leaving tap water overnight
Ordinary municipal chlorine is often blamed for brown tips. At normal drinking-water levels, chlorine is unlikely to be the reason most houseplants develop them.
Free chlorine can gradually decline while water stands.
Chloramine is more persistent. Leaving water overnight does not reliably remove chloramine.
Standing water also leaves sodium, fluoride, alkalinity and most dissolved salts in place.
Which water treatment fits the problem?
| Water concern | Useful option | Practical point |
|---|---|---|
| Water softened with sodium | Use an unsoftened supply; a suitable reverse-osmosis system can also reduce sodium | A bypass tap is often a practical option |
| High dissolved salts or problematic sodium/chloride | Lower-salt water, reverse osmosis or distillation | Standard carbon pitchers usually leave most dissolved salts in place |
| Chloramine | Treatment designed to remove chloramine | Standing the water overnight is ineffective |
| Fluoride in a sensitive plant | A system rated or shown to reduce fluoride | Check the filter specification |
| High alkalinity | A source or treatment that lowers alkalinity | Tap-water pH alone does not measure alkalinity |
| You are not sure what is in the water | Check your water report first | Find out what needs changing before choosing treatment |
“Filtered water” can mean many different things.
Most carbon jug and refrigerator filters are designed to reduce selected contaminants and improve taste and odour. Check the filter specifications to see which substances a particular filter is rated to reduce. Reverse-osmosis and distillation systems change the dissolved mineral content much more substantially.
How to check your local water report
If water quality seems relevant, look for a water-quality report or drinking-water analysis from your local supplier or authority.
Useful entries can include:
- water hardness;
- calcium;
- magnesium;
- conductivity;
- sodium;
- chloride;
- fluoride;
- boron;
- alkalinity, where reported;
- treatment and disinfection method.
Drinking-water limits protect human health. Plant tolerance varies by species.
The report tells you what is in the water. You can then check whether any of the reported levels matter for your plant.
When EC or pH testing can help
Testing can help when the problem keeps returning and you still suspect salts, the water supply or the pH of the potting mix.
Examples include:
- several plants developing the same problem;
- salt deposits that keep returning;
- a private or unusual water source;
- persistent symptoms in valuable plants;
- signs that the pH of the potting mix may be contributing.
Interpret an EC reading with a reference range measured using the same method.
Use commercial growing ranges when the plant, potting mix, fertilising method and test method are comparable to yours.
When brown tips may be part of another problem
Brown tips sometimes appear alongside signs of pests, disease or serious root damage.
Look for pest signs
Spider mites and thrips can both damage houseplant leaves.
Check for:
- fine pale speckles;
- silvery or scuffed-looking areas;
- fine webbing;
- distorted young growth;
- tiny dark specks;
- visible insects or mites.
Inspect both sides of the leaves, new growth and sheltered areas around the leaf stalks.

Once you identify the pest, choose a treatment suited to that pest and plant.
Soft, wet or spreading damage
These signs need a closer look:
- water-soaked patches;
- damaged areas that spread quickly;
- separate spots that keep appearing;
- yellow halos;
- damage spreading from the edge in a defined shape;
- soft decay;
- damage moving into the leaf stalk or stem;
- collapse at the base or centre of the plant.
Disease is one possibility. Cold damage and products used on the leaves can look similar at first, so recent events still matter.
Anthurium and bacterial blight
In Anthurium, bacterial blight caused by Xanthomonas can begin as water-soaked areas along the leaf edge and expand into larger dead sections.

A small, dry, stable brown edge on an otherwise healthy Anthurium can have several causes. If the edge looks wet and the damaged area keeps spreading, investigate disease as a possible cause.
When the whole plant is declining
Inspect the roots and base of the plant closely when you find:
- deteriorating roots;
- potting mix that remains saturated;
- damage at the base of the plant;
- stem collapse;
- extensive root loss.
At this stage, focus on the roots and base of the plant.
What to change once you find the likely cause
Once you have a likely cause, make the change that addresses it.
- The root ball is dry or hard to rewet: water it slowly and evenly, then adjust future watering to its drying speed.
- The pot stays wet too long: improve drainage, review the watering interval, pot size and potting mix, and inspect the roots if decline continues.
- The roots are deteriorating: check for root rot.
- Fertiliser or salt buildup fits what has been happening: pause fertilising and wash excess salts through a freely draining root ball.
- Water softened with sodium is being used: switch to an unsoftened supply.
- You have identified a problem in the water: choose a water source or treatment that addresses it.
- Damage followed cold, heat, stronger direct light or strong airflow: correct that exposure and monitor the plant.
- Damage followed a product used on the leaves: stop the product and check its label before another application.
- A pest is confirmed: treat the identified pest.
- Wet or spreading damage points to another problem: identify the cause before choosing a treatment.
- The damage is old and stable: continue normal care and monitor.
When the problem is not urgent, make changes for a clear reason. This makes it easier to see what helped and keeps the plant's environment more stable while it recovers.
Sometimes two clear problems are happening at once. A plant receiving water softened with sodium while salts are also building up in the pot, for example, benefits from addressing both.
How do you know the plant is recovering?
The existing brown tissue will stay brown.
Watch the boundary around it.
Early signs of improvement include:
- the brown area stops getting larger;
- previously healthy leaves remain healthy;
- no new brown tips appear.
Compare the plant with the dated photo you took when you first noticed the problem.
Healthy later foliage gives further confirmation once the plant is actively growing.
Some houseplants produce new leaves quickly. Others take much longer. Recovery times vary. Watch whether the existing damage stops spreading.
- Existing damage stops spreading.
- Previously healthy foliage stays healthy.
- Later growth develops normally.
Can you cut brown leaf tips off?
Yes. Once the tissue is dry, stable and clearly dead, trimming is a cosmetic choice.
Use clean, sharp scissors and follow the natural outline of the leaf. Remove the dead section while keeping as much healthy green tissue as possible.
Leave soft, wet or actively expanding damage intact while you work out what is causing it.
Trimming improves the appearance of the leaf. Correcting the cause is what prevents new damage.
When further checks can help
Most isolated brown tips can be managed through observation and ordinary care changes.
Persistent, spreading problems or the same damage appearing across several plants sometimes need a closer look.
If the roots still look suspicious
Inspect the roots when:
- the pot stays wet for an unusually long time;
- the plant continues to decline;
- the pot now dries much faster or slower than before;
- obvious problems with light, temperature or watering have already been corrected.
If water or salt buildup still seems likely
Start with the local water report.
A water or potting-mix test can help when:
- several plants are repeatedly affected;
- you use a private or unusual water source;
- salt deposits keep returning;
- the pH of the potting mix may be contributing;
- you want a firmer answer before changing the care of valuable or hard-to-replace plants again.
If you test EC or pH, follow the method supplied with the reference range you plan to use.
If pests may still be involved
Inspect the plant closely and use magnification when needed.
Identify the pest before choosing a treatment.
If disease may be involved
A plant disease specialist or diagnostic laboratory can help when:
- wet or spreading damage continues to develop;
- the stem or base of the plant becomes affected;
- several plants develop similar spreading symptoms;
- knowing the cause would change the treatment;
- a valuable plant continues to decline after reasonable care checks.
If nutrition still looks like a possible cause
Water, potting-mix or tissue testing can help when the affected leaves, recent fertilising and root condition all point towards a nutrient problem.
Use testing when the result will change what you do next.
Frequently asked questions
Why did brown tips appear after repotting?
Repotting changes the conditions around the roots. The new mix may hold water differently, the roots may have been disturbed, and a larger container may dry more slowly.
Check how evenly the root ball becomes wet, how quickly it dries and whether excess water leaves freely.
Why did several plants develop brown tips at the same time?
Start with what they share: water, fertiliser, heating, cold exposure, a recent leaf treatment or nearby pests.
Why did brown tips appear after delivery?
The damage may have started during transport. Cold, drying and physical rubbing can all become more visible over the following days.
Keep conditions steady and watch whether the existing damage stabilises.
Do brown tips mean the humidity is too low?
Sometimes.
Check room humidity alongside root moisture, airflow and the plant's known needs. A hygrometer shows the actual room humidity before you decide whether anything needs changing.
Should I use distilled or reverse-osmosis water?
Use a different water source when your current water contains something that matters to the plant.
Reverse osmosis and distillation can lower many dissolved minerals. If ordinary tap water already suits the plant, keep using it.
Plants watered long term with very low-mineral water still need a complete fertiliser that supplies the nutrients they need.
Should I leave tap water overnight before watering?
Standing can reduce some free chlorine. It does not reliably remove chloramine, and it leaves sodium, fluoride, alkalinity and most dissolved salts in the water.
Can nutrient deficiency cause brown tips?
Yes. Nutrient problems usually come with other symptoms such as yellowing, spotting, distortion or damage concentrated on particular leaves.
Some palms, for example, can develop damaged tips and edges on older leaflets as potassium deficiency progresses.
Can more than one problem be involved?
Yes.
A plant may have dry roots and accumulated salts at the same time, or arrive with transport damage and then face another sudden environmental change.
Address the problems you can clearly identify and keep the rest of the care routine steady.
Sources
Root-zone water relations and container substrates
- Tan, X. et al. Plant water transport and aquaporins in oxygen-deprived environments. Journal of Plant Physiology 227, 20–30, 2018.
- Daniel, K. & Hartman, S. How plant roots respond to waterlogging. Journal of Experimental Botany 75(2), 511–525, 2024.
- Yu, P. et al. Alleviate environmental concerns with biochar as a container substrate: a review. Frontiers in Plant Science 14, 1176646, 2023.
- Poorter, H. et al. Pot size matters: a meta-analysis of the effects of rooting volume on plant growth. Functional Plant Biology 39, 839–850, 2012.
Reservoir, subirrigation and semi-hydro principles
- Davis, A. S., Jacobs, D. F., Overton, R. P. & Dumroese, R. K. Influence of irrigation method and container type on northern red oak seedling growth and media electrical conductivity. Native Plants Journal 9(1), 5–12, 2008.
- Dumroese, R. K., Jacobs, D. F., Davis, A. S., Pinto, J. R. & Landis, T. D. An introduction to subirrigation in forest and conservation nurseries and some preliminary results of demonstrations. USDA Forest Service Proceedings RMRS-P-50, 20–26, 2007.
- Purdue University Extension. Commercial Greenhouse Production: pH and Electrical Conductivity Measurements in Soilless Substrates. HO-237-W, 2009.
Salinity, fertiliser and water chemistry
- Ruter, J. M. Importance of water quality in container plant production. USDA Forest Service Proceedings RMRS-P-69, 36–38, 2013.
- Wang, Z. et al. Response of ornamental plants to salinity: impact on species-specific growth, visual quality, photosynthetic parameters, and ion uptake. Frontiers in Plant Science 16, 1611767, 2025.
- Boser, S. & Rizzo, D. A Water Quality Toolkit for Greenhouse and Nursery Production. Penn State Extension, updated 2025.
- Frink, C. R. & Bugbee, G. J. Response of Potted Plants and Vegetable Seedlings to Chlorinated Water. HortScience 22(4), 581–583, 1987.
- US Environmental Protection Agency. Common Health Questions Related to Monochloramine.
- US Centers for Disease Control and Prevention. About Home Water Treatment Systems.
Nutrient disorders and species-specific physiology
- Yeh, D.-M., Lin, L. & Wright, C. J. Effects of mineral nutrient deficiencies on leaf development, visual symptoms and shoot–root ratio of Spathiphyllum. Scientia Horticulturae 86, 223–233, 2000.
- Broschat, T. K. Nutrition and Fertilization of Palms in Containers. UF/IFAS Extension, ENH1010/EP262.
- McConnell, D. B., Chen, J., Henny, R. J. & Everitt, K. C. Cultural Guidelines for Commercial Production of Interiorscape Dracaena. UF/IFAS Extension, ENH892/EP149.
- Poole, R. T. & Conover, C. A. Fluoride-induced Necrosis of Dracaena deremensis Engler cv. Janet Craig. HortScience 10(4), 376–377, 1975.
- Conover, C. A. & Poole, R. T. Fluoride induced Chlorosis and Necrosis of Dracaena fragrans ‘Massangeana’. Journal of the American Society for Horticultural Science 107(1), 136–139, 1982.
- Ben-Jaacov, J., Poole, R. T. & Conover, C. A. Tipburn of Chlorophytum comosum ‘Vittatum’. HortScience 19(3), 445–447, 1984.
- Chen, J. & McConnell, D. B. Cultural Guidelines for Commercial Production of Interiorscape Calathea. UF/IFAS Extension, ENH1030/EP285.
- UC Statewide IPM Program. Boron Toxicity or Other Specific Ions in Excess.
Chilling, transport and environmental injury
- Chen, J. et al. Chilling Injury in Tropical Foliage Plants: I. Spathiphyllum. UF/IFAS Extension, ENH841/EP101.
- Chen, J., Henley, R. W., Henny, R. J., Caldwell, R. D. & Robinson, C. A. Chilling Injury in Tropical Foliage Plants: II. Aglaonema. UF/IFAS Extension, ENH843/EP103.
- Chen, J. Chilling Injury in Tropical Foliage Plants: III. Dieffenbachia. UF/IFAS Extension, ENH1269/EP530.
- UF/IFAS Extension. Cold Protection of Foliage Plants in Shadehouses and Greenhouses.
- Egri, A. et al. Optics of sunlit water drops on leaves: conditions under which sunburn is possible. New Phytologist 185, 979–987, 2010.
- Iowa State University Extension. How can I raise the relative humidity indoors for my houseplants? Updated 2022.
Pests, disease and products used on leaves
- Pittenger, D. R. & Hodel, D. R. Pest Notes: Houseplant Problems. UC Agriculture and Natural Resources Publication 74172, 2020.
- UC Statewide IPM Program. Pest Notes: Spider Mites, Publication 7405.
- Bethke, J. A., Dreistadt, S. H. & Varela, L. G. Pest Notes: Thrips, UC ANR Publication 7429.
- Norman, D. J. & Ali, G. S. Anthurium Diseases: Identification and Control in Commercial Greenhouse Operations. UF/IFAS Extension, PP292.
- UConn Home & Garden Education Center. Insecticidal Soaps.
- Frank, S., Baker, J. & Bambara, S. Horticultural Oils for Ornamental Plants. NC State Extension, reviewed 2023.


Leave a comment