Complete Baby Plant Care Guide: What to Do After Purchase
Baby Plant Care Guide: From Unboxing to Strong, Steady Growth
Baby plants are one of the easiest ways to start small, grow rarer houseplants gradually, and watch every new leaf develop from the beginning. They are also young plants with fine roots, limited reserves, and less tolerance for sudden changes. After shipping, they need calm conditions first, not repotting, feeding, or constant adjustments.
This baby plant care guide walks you through every stage: unpacking, the first 24 hours, the first week, light, watering, long-term care, repotting, common problems, and the point where your mini plants begin to settle into steady growth. Use it as a practical reference whenever a new starter plant arrives.

Contents:
- What exactly are baby plants?
- How to unbox baby plants safely
- First 24 hours after delivery
- Light and watering for baby plants
- Helping baby plants settle during the first week
- Long-term baby plant care
- Common baby plant problems and fixes
- What healthy baby plant growth looks like
- Shop baby plants at Foliage Factory
What Exactly Are Baby Plants?
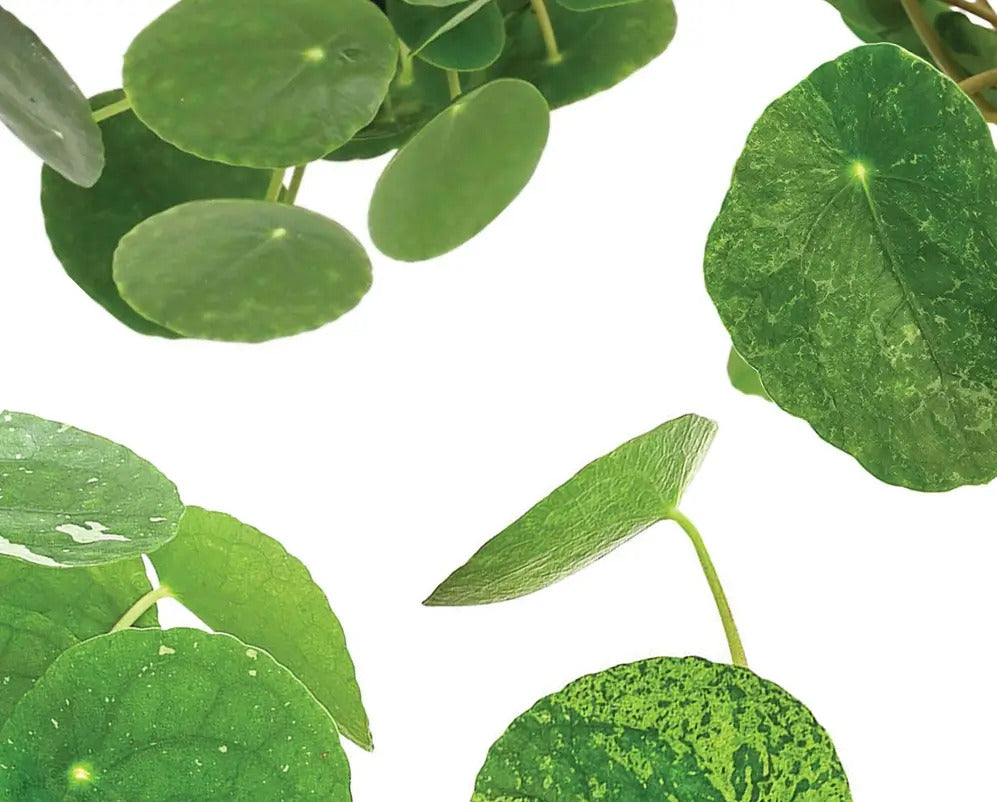
Baby plants, also called mini plants or starter plants, are young indoor plants sold in small nursery pots, often around 6 cm wide and roughly 10–15 cm tall depending on species and batch. Their compact size makes them affordable, easy to place, and ideal for building a houseplant collection gradually.
Small size does not mean they are maintenance-free. Baby plants have a limited root system, less stored energy, and a smaller margin for watering mistakes. A mature houseplant can often tolerate a short dry spell or one imperfect watering better than a small starter plant. With baby plants, stable conditions matter from the beginning.
How baby plants are propagated and prepared
Baby plants can be produced from cuttings, division, seed, or tissue culture, depending on species and cultivar. Rare and variegated houseplants are often started through tissue culture, a controlled lab-based propagation method that grows new plants from small pieces of selected plant material.
Tissue culture can help nurseries produce cleaner, more consistent batches and make certain rare plants available at smaller sizes. It does not mean a finished plant is impossible to stress, impossible to damage, or automatically protected from every future problem. After lab propagation, young plants still need to be acclimated, rooted, grown on, packed, shipped, and settled into a home environment.
- Controlled start: Tissue-cultured plants begin under clean, monitored conditions, which can reduce early pest and pathogen pressure.
- Consistent batches: Plants from the same clone line are usually more uniform, though variegation and juvenile growth can still vary.
- Better access to rare plants: Compact starter sizes make unusual cultivars easier to ship and more accessible for collectors.
Popular baby plants such as Monstera, Philodendron, Alocasia, Anthurium, Ficus, Begonia, and Goeppertia can all grow well from small starter plants when their first weeks are handled carefully.
How to Unbox Baby Plants Safely
Shipping is a short period of darkness, movement, changing temperature, and reduced airflow. For baby plants, that can lead to temporary drooping, bent leaves, loose substrate, or older leaves yellowing shortly after arrival. These signs are not automatically a disaster. The first job is to unpack slowly, inspect calmly, and avoid adding extra stress.
Step-by-step unboxing checklist
- Open the box carefully: Use scissors or a craft knife and cut away from plant material. Do not tear through packaging, because small stems and petioles can be tucked close to the wrapping.
- Remove padding slowly: Peel back paper, padding, or protective wrap bit by bit. If plant material is caught, free it from the base rather than pulling from a leaf or stem.
- Settle loose substrate: A little shifted potting mix is normal after transit. Tip the pot gently back into place or brush off excess mix without pressing the surface down hard.
- Check leaves and stems: Slight drooping, bent leaves, or minor yellowing on an older leaf can happen after shipping. Soft stems, a sour smell, collapse at the base, or blackened tissue need closer attention.
- Inspect the substrate surface: Light surface mold can appear when organic mix stays damp in packaging. Remove affected loose material, improve airflow, and avoid keeping the plant sealed in stale, wet air.
- Check for pests: Look under leaves, around new growth, and near the soil line. If you see moving insects, webbing, sticky residue, or cottony clusters, isolate the plant before placing it near others.
- Move it to steady light: Place the plant in bright, indirect light away from strong direct sun, hot glass, heaters, cold drafts, and radiator airflow.
Good first rule: Do not repot on arrival unless there is a clear emergency such as severe rot, a broken pot, or a completely collapsed root zone. Roots recover best when they are left undisturbed during the first acclimation period.

First 24 Hours After Delivery
The first 24 hours are about stability. Baby plants have just moved from a controlled growing environment through packaging and shipping into a new home. Keep conditions predictable: no repotting, no fertilizer, no direct sun, no repeated moving around, and no unnecessary root checks.
What not to do on day one
- Do not repot immediately: Even if the nursery pot looks small, wait until the plant has settled unless there is a genuine root-health issue.
- Do not fertilize: Feeding a stressed baby plant does not fix shipping stress. It can irritate tender roots, especially if the potting mix is already moist.
- Do not place it in direct sun: Young leaves can scorch quickly after dark transit. Bright, filtered light is safer.
- Do not keep lifting it out of the pot: Root checks are only useful when there is a real warning sign, such as a sour smell, mushy base, or persistent collapse in wet mix.
What to do instead
- Check moisture before watering: Feel the upper layer of the mix and lift the pot to judge weight. In a 6 cm pot, even the top 1 cm is a meaningful dry-down, so avoid watering just because the surface looks slightly uneven after shipping.
- Water only if needed: If the mix is dry and the pot feels light, water evenly and let excess drain fully. If the mix is still moist or the pot feels heavy, wait.
- Choose bright, indirect light: A position near a north- or east-facing window often works well. Near a stronger south- or west-facing window, keep the plant back from direct midday sun or use a light curtain.
- Keep temperature steady: Aim for a stable, warm indoor range, roughly 18–24 °C for many tropical baby plants. Avoid cold windowsills at night and hot air from heaters.
- Prioritize conditions over additives: Seaweed extract, humic products, or plant tonics are optional at best. Stable light, moderate moisture, warmth, and airflow matter more during the first week.
Helpful to know: A baby plant can look slightly tired after shipping and still recover well. Judge the whole plant, not one bent or yellowing older leaf.

Light and Water: What Baby Plants Actually Need
Baby plants are smaller, but their care is not automatically simpler. Their small pots dry quickly, yet their young roots can rot if the mix stays wet for too long. Their leaves need enough light to support growth, but harsh direct sun can damage tender tissue. The goal is balance, not intensity.
Light requirements for baby plants
Most tropical starter plants do best in bright, indirect light. That means enough brightness for steady growth without strong sun hitting the leaves for long periods.
- Good positions: Near a north- or east-facing window, or a little further from a brighter window with filtered light.
- Use distance as a tool: A plant 1–2 meters back from a very sunny window may receive better light than one pressed against hot glass.
- Avoid sudden sun exposure: Baby leaves can bleach, crisp, or develop dry patches when moved straight from shipping into strong midday sun.
- Watch the growth response: If the plant leans strongly, stretches, or produces weak, spaced-out growth, light may be too low.
If your space is naturally dim, a grow light can be useful. Keep it moderate, consistent, and not too close to tender leaves. Baby plants need usable light, not harsh intensity.
Simple habit: Rotate the pot every few days if the plant leans toward the light. This keeps growth more balanced without changing its whole setup.
Watering baby plants by plant type
There is no single watering schedule for all baby plants. Pot size, root size, substrate, temperature, light, and airflow all change how fast a plant uses water. Use the plant type as a starting point, then adjust by checking the pot and mix.
Tropical baby plants: Monstera, Philodendron, Anthurium, Alocasia
- Water when the upper layer has started to dry and the pot no longer feels heavy.
- Keep the mix lightly moist, not constantly wet.
- Use room-temperature water and let excess drain fully.
- Do not leave the nursery pot standing in water inside a cover pot.
- Humidity around 50–70% can help many tropical baby plants, but airflow still matters.
Baby Ficus: Ficus benjamina, Ficus elastica, Ficus lyrata types
- Let more of the potting mix dry before watering again.
- Avoid swinging between bone-dry mix and saturated mix.
- Keep placement consistent, because many Ficus plants react to abrupt changes in light, temperature, and watering.
- Expect some older-leaf drop during adjustment, especially after transport or a major change in conditions.
Baby succulents and low-water plants: Haworthia, Crassula, Sansevieria types
- Water only once the mix is dry through most or all of the pot.
- Use a fast-draining, mineral-leaning mix rather than dense, moisture-retentive potting soil.
- Give brighter light than most tropical baby plants, but still acclimate gradually.
- Be extra careful in cool, low-light conditions, where wet mix can remain wet too long.
Humidity without overdoing it
Many baby plants appreciate moderate humidity, especially thin-leaved tropical plants, young Anthurium, Begonia, Goeppertia, and young Alocasia. Constantly wet leaves are not the goal. Misting gives only a short humidity spike and can leave sensitive leaves damp if airflow is poor.
- Group compatible plants together to create a slightly more stable microclimate.
- Use a small humidifier nearby if indoor air is consistently dry.
- For very delicate baby plants, a clear cover, propagation box, or vitrine can help short term, but it must have ventilation.
- Gradually open any cover over several days so the plant does not crash when humidity drops.
Need plant-specific care advice?
Each plant variety has its own rhythm. A baby Alocasia will not behave exactly like baby Hoya, baby Ficus, or baby Monstera. You can find detailed care notes for individual plants in our full plant collection, including light, watering, substrate, humidity, and growth habit guidance.

Helping Baby Plants Settle During the First Week
The first day is about recovery. The first week is about resisting the urge to do too much. Baby plants often show their adjustment slowly: one older leaf yellows, a petiole droops, growth pauses, or the plant leans toward the light. These signals are useful, but they do not always require immediate intervention.
Most baby plants need space, bright indirect light, careful watering, and time. Fast fixes such as repotting, fertilizing, trimming too much, or changing the position every day usually create more stress than they solve.
What to watch during the first week
- Leaning toward light: Normal after placement. Rotate the pot gradually instead of moving it to a harsher spot.
- Drooping leaves: Check moisture first. Drooping can come from dry mix, wet roots, heat, cold, or shipping stress.
- Curling leaves: Often linked to water stress, dry air, strong light, or sudden temperature changes.
- Yellowing older leaves: One or two older leaves may yellow while the plant adjusts. Soft stems, spreading yellowing, or a sour smell are more serious.
- No visible growth: Normal. A newly arrived baby plant may focus on root recovery before producing new leaves.
A simple 7-day care rhythm
- Day 1–2: Let the plant rest in bright, indirect light. Check moisture, but avoid repotting or feeding.
- Day 3–4: Recheck pot weight and moisture. Water only if the mix has dried enough for that plant type.
- Day 5–6: Look at posture and light response. Rotate gently if the plant is leaning.
- Day 7: Check roots only if there are clear warning signs such as sour smell, mushy base, persistent collapse, or wet mix that does not dry.
Growth check: New growth is a better health signal than an older leaf. A baby plant can shed a small older leaf and still be settling well.
Long-Term Baby Plant Care
After the first 2–4 weeks, most baby plants move from adjustment into active establishment. This is when care can become a little more growth-focused: consistent watering, enough light, gentle feeding when growth is visible, and repotting only when the root system is ready.
The aim is not to push a baby plant to grow as fast as possible. Strong growth comes from a root system that has enough oxygen, moisture, light-supported energy, and space without being overwhelmed by an oversized pot.
Watering: build a rhythm, not a fixed schedule
A calendar can remind you to check plants, but it should not decide when to water. Baby plants dry at different speeds depending on pot size, root density, substrate, light, temperature, and airflow.
- Check the mix and the pot weight: A light pot with a dry upper layer usually needs water sooner than a heavy pot with cool, damp mix.
- Adapt to conditions: Plants in brighter, warmer conditions usually use water faster. Plants in cooler, dimmer conditions usually stay wet longer.
- Water evenly: When watering is needed, moisten the mix properly and let excess drain away.
- Protect root oxygen: Never leave baby plants sitting in standing water. Fine roots need air as much as moisture.
- Use drainage: A nursery pot inside a decorative cover pot is safer than planting directly into a pot without drainage holes.
Want to understand watering in more detail?
Our watering guide explains how pot size, substrate, light, and root health change watering needs indoors.
Fertilizing baby plants gently
Baby plants do not need heavy feeding early on. Fertilizer supports growth only when the plant is already stable enough to use it. If roots are stressed, the mix is too wet, or light is too low, feeding can create more problems than benefits.
- When to start: Wait until the plant has been stable for several weeks and is producing new growth.
- What to use: Use a balanced houseplant fertilizer diluted more weakly than the full label rate.
- How often: Feed lightly every 4–6 weeks while the plant is actively growing in suitable light.
- When to pause: Hold fertilizer if the plant is stressed, newly repotted, waterlogged, pest-affected, or not growing.
Root safety matters: More fertilizer does not mean faster establishment. Tender young roots can be damaged by concentrated salts.
Need more detail on fertilizer strength and semi-hydro care?
Read our semi-hydro fertilising guide for soil-grown plants, mineral substrates, and semi-hydro setups.
When to repot baby plants
Repotting is useful when roots are ready for more space. Repotting too early can leave a small root system sitting in too much damp mix, which increases rot risk. A slightly snug nursery pot is not automatically a problem for a newly arrived baby plant.
- Wait after purchase: In most cases, wait at least 4–6 weeks before repotting.
- Look for root signs: Roots circling the pot, roots pushing through drainage holes, or a pot that dries very quickly can mean it is time to size up.
- Choose a small upgrade: Move only 1–2 cm wider in diameter. Oversized pots stay wet too long around young roots.
- Match the substrate to the plant: Use airy aroid mix for many Philodendron, Monstera, Anthurium, and Alocasia types; use a grittier, faster-drying mix for succulents and low-water plants.
- Be gentle with the root ball: Loosen only what needs loosening. Do not wash roots clean unless you are treating a serious root problem.
Need help choosing pot size or substrate?
Our repotting guide covers timing, pot size, drainage, substrate types, and root handling in more detail.

Common Baby Plant Problems and How to Fix Them
Even with good care, baby plants can show stress while settling. The important part is reading the signs correctly. Yellowing, drooping, curling, or slow growth can have several causes, so check moisture, light, temperature, and root condition before changing everything at once.
Yellowing leaves
Likely causes:
- Overwatering or mix staying wet for too long
- Normal loss of one older leaf after shipping
- Low light combined with wet substrate
- Cold stress or root damage
What to do:
- Check pot weight and substrate moisture before watering again.
- Make sure the nursery pot drains freely.
- Move the plant into bright, indirect light if it is sitting in a dim spot.
- Remove fully yellow, soft leaves once they detach easily or clearly will not recover.
- Inspect roots only if yellowing spreads quickly or the base smells sour.
Wilting or drooping
Likely causes:
- Dry mix and thirsty roots
- Wet mix and low root oxygen
- Heat, cold, or drafts
- Normal shipping stress during the first few days
What to do:
- If the pot is light and the mix is dry, water evenly and let excess drain.
- If the pot is heavy and the mix is wet, wait and improve airflow around the plant.
- Move the plant away from cold glass, heaters, direct radiator airflow, and open windows.
- Avoid fertilizing a drooping plant until the cause is clear.
Crispy edges or pale patches
Likely causes:
- Direct sun after shipping
- Very dry air around thin-leaved plants
- Underwatering followed by hot, bright exposure
- Fertilizer applied too early or too strongly
What to do:
- Move the plant into bright, filtered light.
- Check whether the pot is drying too fast between waterings.
- Group humidity-loving plants together or use a small humidifier nearby.
- Hold off on fertilizer until new growth is steady.
Pests on baby plants
Young plants should always be inspected before joining a larger collection. Tissue-cultured plants may start under cleaner, more controlled conditions, but any plant can encounter pests during growing, transport, retail handling, or once it is already in a home with other plants.
What to look for:
- Tiny black flies around the potting mix, often fungus gnats
- Fine webbing, pale speckling, or dusty-looking leaves, often spider mites
- Sticky residue, small bumps, or cottony clusters, often scale or mealybugs
- Silvery scarring, black specks, or distorted new growth, often thrips
What to do:
- Isolate the affected plant from the rest of your collection.
- Identify the pest before treating, because fungus gnats, mites, thrips, scale, and mealybugs need different approaches.
- For fungus gnats, let the upper mix dry more between waterings and treat larvae if the problem continues.
- For leaf pests, wipe leaves where possible and use a gentle, plant-safe treatment suited to the pest and plant type.
- Repeat checks weekly, because many pests need more than one treatment cycle.
Collection safety: A 1–2 week quarantine for new baby plants is a simple way to protect established plants, especially if you keep rare, variegated, or slow-growing cultivars.
Need pest-specific help?
Visit our pest control guides for step-by-step help with fungus gnats, spider mites, thrips, scale, mealybugs, and other common houseplant pests.

What Healthy Baby Plant Growth Looks Like
Baby plant growth is not always fast or perfectly even. A newly arrived plant may sit still for a while, then produce a new leaf once roots have adjusted. Some weeks bring visible progress; other weeks are mostly root work below the surface. That rhythm is normal.
If a young Monstera, Syngonium or pothos does not look like the mature plant yet, that can be normal development; our heteroblasty guide explains why juvenile and adult leaves can differ.
Healthy development usually shows through small, steady changes rather than dramatic overnight growth.
- New leaves: Fresh leaves should gradually look firmer, better shaped, or slightly larger as care becomes consistent.
- Stronger stems or petioles: Upright growth often improves once roots settle and light is adequate.
- Root activity: A pot that dries a little more predictably can be a sign that roots are using water well.
- Growth habit: Climbing plants may begin reaching upward, trailing plants may extend, and rosette plants may fill out from the center.
Variegated baby plants may grow more slowly than fully green plants, especially when they carry large pale sections. That is not automatically a problem. The goal is balanced growth supported by enough usable green tissue, steady light, and careful watering.
Simple tracking tip: Take a photo every two weeks in the same spot. It makes slow progress easier to see and helps you notice changes before they become problems.
Shop Baby Plants at Foliage Factory
Baby plants are a good way to build a plant collection slowly, try rarer varieties at a smaller size, or grow a plant from its early stages. Start with steady light, careful watering, and a little patience, and your small plant has a much better chance of becoming a strong, established houseplant.
If a baby plant arrives damaged or starts declining quickly after delivery, take clear photos of the whole plant, close-ups of the issue, and the packaging, then contact us so we can help within our 28-day plant guarantee period.
Shop all baby plants and choose your next small starter plant, packed with care for a safe journey to your home.

Leave a comment