
From Soil to Semi-Hydro: The Complete Guide to Transitioning Houseplants Without Killing Them
This is your no-fluff, myth-free guide to converting houseplants to semi-hydroponics — without root rot, stalling, or unnecessary stress. Whether you're growing a few tropicals or managing an entire plant room, you'll find everything you need to make the switch confidently. Or not — but by the end, you'll know exactly whether semi-hydro is right for you and your plants.

Table of Contents

1. Why Switch to Semi-Hydro — and When You Shouldn’t
Semi-hydroponics replaces organic soil with a passive, mineral-based system that uses capillary action to deliver water and nutrients. It works particularly well for tropical foliage plants like Monstera, Philodendron, Anthurium, Calathea, and Hoyas.
✔ Why Many Growers Prefer Semi-Hydro
- Consistent moisture levels without soggy soil
- Reduced fungus gnat and mold risk (no peat)
- Easy to monitor water and root health
- Cleaner indoor care — no soil spills
- Substrates are inert, reusable, and don’t compact
✖ When Semi-Hydro Is Not Ideal
- You grow cacti, Lithops, or dry-dormant plants
- Your humidity stays below 30%
- You rely on neglect or forget to water entirely
- You use hard tap water and can’t filter or flush
- Your plant is in deep dormancy (e.g. caudex-formers)
Should You Switch? A Quick Summary
✔ Switch to semi-hydro if... |
✖ Hold off if... |
|---|---|
You want consistent moisture & clean care |
You grow dry-adapted succulents or caudex plants |
You can flush and feed occasionally |
You need full neglect tolerance |
Your plant has active roots or growth |
The plant is dormant or root-bound in soil |
You want fewer pests, mold, and soil issues |
You rely on organic feeding or compost |
If you’re growing tropicals in an indoor environment with moderate humidity and light, you’re likely a great candidate.

2. How Semi-Hydro Works: Water Movement, Root Changes, and Setup Basics
Capillary Action = The Heart of the System
Semi-hydroponics depends on capillary action — the upward movement of water through tiny gaps between particles. This wicking effect moves water from a reservoir up through the substrate to the plant’s roots.
- Small-grain materials like Seramis, zeolite, and Pon wick extremely well
- Coarse particles like LECA and lava rock wick poorly unless primed or mixed
- Always top-water initially or soak coarse media to trigger capillary flow
Think of it like a sponge at the base of your pot — it draws moisture upward as needed.
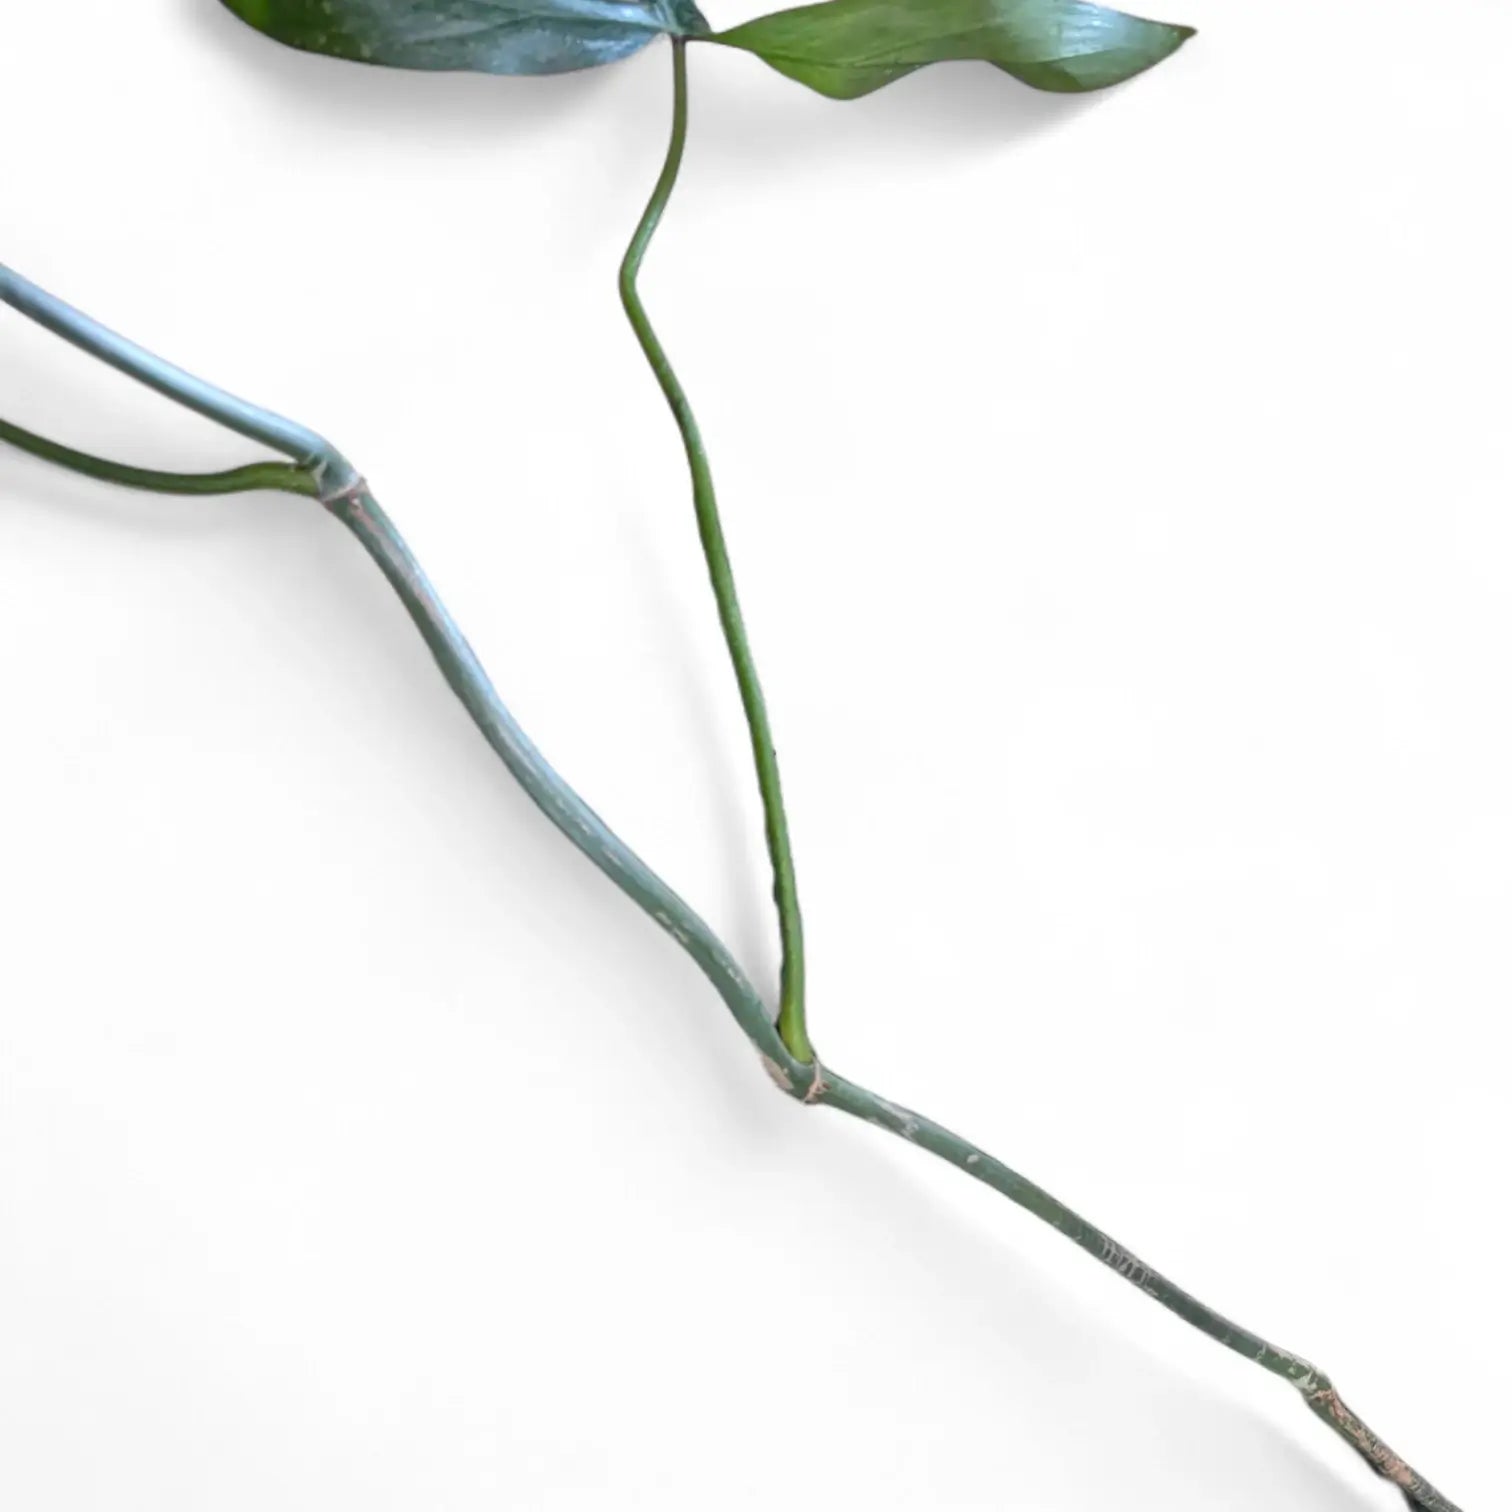
Root Adaptation: What’s Normal, What’s Not
When transitioning, soil roots typically die off — they’re built for air pockets, not constant moisture. Water roots (aka hydro roots) are thicker, smoother, and adapted to stay hydrated continuously.
✔ Normal during transition:
- Brown, stringy roots falling away
- No visible new growth for 2–4 weeks
- Pale, firm water roots emerging over time
✖ Not normal:
- Sour smell from the pot
- Mushy, collapsing crown
- Entire root system turning to mush without regrowth
💡Root melt isn’t failure — it’s a sign the plant is adapting. Wait for new roots before panicking.
What Every Semi-Hydro Setup Needs
To function well, every passive hydro system needs:
- A pot with drainage into a small water reservoir
- An inert mineral substrate (no organic matter!)
- A cover pot, reservoir insert, or external tray to hold water
- Humidity above 45–50%, especially in early transition
Avoid full submersion of roots early on. Start with 1–2 cm of water at the base and top-water occasionally until hydro roots grow down into the moisture zone.

3. Choosing the Right Substrate for Semi-Hydro
The substrate you use in semi-hydro replaces soil entirely — so it must provide structure, oxygen, and consistent access to water without compacting, decomposing, or feeding pathogens.
But not all inert media perform the same. Some hold more water, some offer better airflow, and others don’t wick at all without help.
Here’s how to choose the right material (or blend) for your plant’s root type and conditions.
What Makes a Good Semi-Hydro Substrate?
Feature |
Why It Matters |
|---|---|
Inert & pH-neutral |
No rot, no pests, no nutrient disruption |
Porous but stable |
Allows oxygen flow and doesn’t collapse |
Reusable |
Rinses clean, lasts multiple cycles |
Capillary-capable |
Draws water upward from reservoir |
💡 Remember: fine-grain materials like Pon and zeolite wick well; large particles like LECA and lava need help (pre-soaking or mixing).
Substrate Comparison Table
Substrate |
Water Retention |
Aeration |
Wicking |
Nutrient Buffer |
Best For |
|---|---|---|---|---|---|
LECA |
Low–Medium |
High |
Medium |
Low |
Aroids, orchids, Hoyas |
Pon |
Medium–High |
Medium |
High |
High |
Calathea, Peperomia, soft roots |
Seramis |
Medium–High |
Medium |
Medium |
Medium |
Cuttings, Maranta, seedlings |
Pumice |
Low |
High |
Low |
Low |
Succulents, Euphorbia, mixes |
Perlite |
Low |
Very High |
Weak |
None |
Propagation, lightweight blends |
Zeolite |
Medium |
Medium |
High |
High |
Root-sensitive species, prayer plants |
Lava Rock |
Low |
High |
Low |
None |
Large pots, base layer, stability |
📌 Additional Substrate Notes
LECA (Lightweight Expanded Clay Aggregate)
- High airflow, but poor wicking in deep pots
- Needs pre-soaking or regular top-watering to activate
- Doesn’t retain nutrients — feed consistently
Pon
- Wicks well and holds nutrients longer
- Heavier than LECA = more stability in tall pots
- Breaks down slowly over time — flush monthly
Seramis
- Great for fine roots, cuttings, and surface hydration
- Can soften and compact — replace every 12–18 months
- Use as a blend component for adult plants
Pumice
- Very airy, long-lasting, low water retention
- Doesn’t wick — pair with Seramis, Pon, or zeolite
- Perfect for semi-arid and succulent mixes
Perlite
- Ultra-light, fragile, non-wicking
- Use as a supportive additive (10–20%) in blends
- Can be used solo in wick-fed setups only — not recommended for beginners
Zeolite
- Holds nutrients and moisture evenly
- Great for Calathea, Ctenanthe, or plants with sensitive roots
- Doesn’t degrade — rinse and reuse long-term
Lava Rock
- Heavy, stable, zero wicking ability
- Use in base layer of large pots to improve balance and airflow
- Not a core substrate on its own — always blend with finer media
❓ So How to Choose the Right One?
No single substrate works for all species. Your choice depends on:
- Root structure (thick vs. fine)
- Humidity levels (high = slower drying)
- Reservoir style (wick-fed vs. full passive)
- Mixing needs (weight, retention, buffering)
💡Thick, aerial roots (Monstera, Philodendron) love airflow
💡Fine, moisture-sensitive roots (Calathea, Maranta) need better wicking and buffering
We’ll break all of this down in the next section, with practical recipes tailored to your plant’s needs.
Curious about the science behind LECA, Pon, pumice, or zeolite?
📌 Check out our deep dive into non-organic substrates for detailed performance comparisons, substrate chemistry, and how each material affects airflow, wicking, and nutrient buffering.
4. Custom Mineral Mixes by Plant Type
No single substrate blend fits all houseplants. Your ideal mix depends on root structure, humidity tolerance, and your setup’s moisture behavior.
Here are tested, mineral-only recipes, organized by plant type — with optional tweaks for pot size, humidity, and root sensitivity.
💡 Why Perlite Shows Up Often
Perlite is added in small amounts to improve airflow, lighten heavy mixes, and speed up drying near the crown — especially helpful in humid rooms or for rot-prone plants. Use washed horticultural-grade perlite, not building-grade.
💡 Reminder: These Are Modular Starting Points
All ratios are adjustable. Don’t chase perfection — match your mix to how fast your substrate dries, how your plant responds, and how often you want to flush. Start simple, observe, then adapt.

5. Step-by-Step Transition Guide – From Soil to Semi-Hydro Without Root Rot
Switching a plant from soil to semi-hydro is a biological reset — not just a repot. Soil roots are adapted to air pockets and irregular moisture. In contrast, hydro systems deliver consistent moisture via passive capillary flow, which means your plant needs time to adapt.
This section walks you through a smooth, myth-free transition process, helping you avoid rot, stalling, and unnecessary stress.
Step 1: Prepare the Plant
Make sure your plant is:
- Actively growing or at least not dormant
- Healthy enough to tolerate some root loss
- Not freshly watered — wait 1–2 days after the last watering
Then:
- Remove it from the pot and loosen the root ball
- Rinse off as much soil as possible using lukewarm water
- Trim only fully black, mushy, or hollow roots — keep anything firm, even if discolored
⚠️ Don’t overclean: a few specks of soil won’t cause rot. Digging aggressively damages fine root hairs and slows adaptation.
Once potted, do not unpot to check roots again — this only resets the process.
Step 2: Choose Your Temporary Setup
You’ll need:
- A nursery pot with bottom drainage + external or internal reservoir
- A clean, pre-rinsed mineral substrate (see Section 4)
- Optional wick strip or moss collar for very short roots
- Optional stake or soft tie if the plant is top-heavy
💡 Breathable or mesh pots help maintain oxygen flow around the roots during the early transition phase.
Step 3: Pot In and Water Correctly
- Gently position the plant in the substrate — don’t compress or pack tightly
- Top-water until the reservoir contains 1–2 cm of water at the base
- Ensure roots sit just above the waterline — not submerged initially
⚠️ Submerging unadapted roots can cause suffocation and melt. Keep the water line low and increase only once new hydro roots begin growing downward.
💡If the plant is unstable, use a bamboo stake or soft plant tie to prevent wobbling.

Step 4: Acclimate and Observe
The next 2–4 weeks are all about adaptation. Expect temporary changes as the plant reprograms its root system:
✔ Normal signs:
- Some drooping in the first 2–3 days
- Browning or shedding of old soil roots
- No new leaf growth for 2–3 weeks
- New pale hydro roots appearing after 2–4 weeks
✖ Warning signs:
- Crown collapse or mushy stem
- Persistent droop after week 2
- Foul smell or slimy substrate
- No new root tips or growth after 4–5 weeks
💡 Keep humidity above 50%, avoid intense sun, and don’t fertilize yet. Just use soft, room-temperature water.
Step 5: Resume Feeding (Gently)
Once you observe:
- Pale new roots at the base of the pot
- A fresh shoot or new leaf emerging
- Consistent water uptake from the reservoir
…then it’s time to start feeding.
Start with ¼-strength hydroponic or semi-hydro fertilizer, diluted in clean water. Alternate feedings with plain water to prevent salt buildup.
⚠️ Do not use soil, coco, or organic fertilizers in semi-hydro setups. These often contain biological materials (fish, kelp, compost, etc.) designed to break down in soil. In a closed, stagnant water system, they:
- Feed anaerobic bacteria
- Turn the reservoir sour or smelly
- Clog the substrate with slime and biofilm
- Suffocate roots and trigger rot
Stick with mineral-based, pH-stable hydroponic nutrients only. For dilution rates and formula recommendations, refer to Section 6.
📌 Quick Transition Tips Recap
- Root melt ≠ root rot — it’s part of the reset
- Use stakes to prevent stem movement
- Don’t submerge roots early on — keep water level low
- Avoid touching the roots once planted
- Never fertilize before visible hydro root growth
- Skip soil-based or organic feeds — they rot in water

6. Feeding & Flushing – How to Fertilize in Semi-Hydro Without Burning Roots
In semi-hydro, nutrition is entirely in your hands. Mineral substrates like LECA, Pon, and pumice provide zero nutrients — so regular feeding is essential. But because roots absorb directly from the water, mistakes show up fast. Overfeeding, wrong formulas, or skipped flushes can all lead to damage.
This section breaks down how to fertilize correctly, when to start, what to avoid — and how to keep your water clean and your roots thriving.
When to Start Fertilizing
Never feed right after switching from soil to semi-hydro. Wait until at least one of the following is true:
- You see new pale hydro roots forming
- A new leaf or shoot has started to grow
- Water is disappearing consistently from the reservoir
For most plants, this happens around 2–4 weeks post-transition. No signs yet? Don’t feed — just wait.
How Often to Fertilize
Feed every second or third watering, alternating with plain water. This avoids salt buildup, which can burn roots and stall growth.
Plant Type |
Dilution |
Feed Frequency |
|---|---|---|
Aroids (Monstera, Philodendron) |
¼ to ½ strength |
Every 2nd watering |
Hoyas, Peperomia |
¼ strength |
Every 2nd or 3rd |
Prayer plants (Calathea, Maranta) |
Max ¼ strength |
Every 3rd, flush often |
Succulents, Euphorbia |
⅛ to ¼ strength |
Monthly during growth |
Rooted cuttings & young plants |
⅛ strength |
Every 2–3 weeks |
💡 What does "¼ strength" mean?
If your fertilizer says 5 ml per liter, use just 1.25 ml per liter. Always pre-dilute in water before adding it to the reservoir. Never pour concentrate directly onto the roots.
What Fertilizer Should I Use?
✔ Use hydroponic or semi-hydro specific fertilizers
These formulas are designed for passive watering systems. They contain stable, readily available nutrients, and they don’t rot or clog the reservoir.
If you’re using a hydro-specific fertilizer, follow the manufacturer’s dilution instructions for passive systems. These are typically balanced around 3–1–2 or 5–3–2 NPK with added micronutrients like magnesium, calcium, and iron.
✖ Avoid soil or coco fertilizers
These often contain organics, bio-stimulants, or slow-release elements intended for microbe-rich soil. In semi-hydro, these ingredients break down in stagnant water and cause serious issues:
- Bacteria and algae growth in the reservoir
- Sour or foul smells within days
- Anaerobic rot around the roots
- Clogged substrates and collapsed oxygen levels
Even "organic-certified" soil fertilizers (like fish emulsion or seaweed extract) will rot in semi-hydro systems and lead to root failure.
Common Fertilizer Mistakes to Avoid
✖ Organic fertilizers (fish, kelp, compost tea): rot and clog the reservoir
✖ Urea-based formulas: rapid EC spikes, root burn risk
✖ Soil or coco-specific blends: not water-stable, feed unpredictably
✖ Slow-release pellets (Osmocote, tabs): not designed for submerged systems
⚠️ Watch for early warning signs of overfeeding:
- Browning at leaf tips
- Faded new growth
- White crust on substrate or pots
- Cloudy, smelly reservoir water
💡 What Should I Look For in a Semi-Hydro Fertilizer?
- Nitrate-based nitrogen (NO₃⁻), not urea
- Balanced macro nutrients (e.g. 3–1–2, 5–3–2)
- Added micronutrients (Mg, Fe, Ca, Mn, B, Zn)

Why Flushing Is Essential
Fertilizer salts accumulate over time, even if you’re feeding gently. Flushing clears out these residues, prevents root burn, and resets the medium.
How to flush:
- Top-water with clean, pH-neutral water until reservoir overflows
- Repeat twice if you see white crust
- Let the pot fully drain
💡Flush every 2–3 weeks for most plants — more often in:
- Small pots
- High humidity setups
- Substrates like Seramis, Pon, or zeolite, which retain more salts
Feed & Flush Monthly Example
Week |
Action |
|---|---|
1 |
Feed at ¼ strength |
2 |
Water only (flush) |
3 |
Feed again |
4 |
Flush thoroughly |
💡 Always adjust based on growth rate, humidity, and reservoir use.
Optional: EC / TDS Meter Tips
If you're managing 10+ plants or sensitive species, an EC or TDS meter helps fine-tune your feeding.
Reading Type |
Ideal Range |
What to Do |
|---|---|---|
EC |
0.5–1.5 mS/cm |
Most tropicals grow well here |
TDS |
300–1000 ppm |
Safe range for moderate feeders |
EC > 2.0 |
Too high |
Flush immediately, reduce next feed |
TDS < 150 ppm |
Underfed |
Increase dilution slightly |
pH |
5.8–6.2 ideal |
Use rain, filtered, or soft water if needed |
Common Feeding Problems and Fixes
Symptom |
Likely Cause |
Solution |
|---|---|---|
Leaf tips turning brown |
Salt buildup |
Flush twice, reduce feeding strength |
Pale new growth |
Underfeeding or pH issue |
Increase feed slightly, check water pH |
Cloudy or smelly water |
Organic contamination |
Stop organics, flush fully |
Crust on substrate |
Accumulated salts |
Flush heavily, review fertilizer dose |
📌 Final Tips
- Never fertilize a plant that hasn’t started using water
- Flush more often with soft or fine substrates
- Less is better: consistent light feeding beats heavy sporadic doses
- Always let water reach room temperature (18–22 °C) before use
- If you ever doubt what’s in your fertilizer — don’t use it

7. Daily, Weekly & Seasonal Care in Semi-Hydro
Stable conditions = stable care. In semi-hydro, your routine doesn’t need to change unless your environment does.
Most tropical plants in nature grow year-round under consistent light, temperature, and humidity. So unless your indoor conditions shift significantly, you shouldn’t blindly reduce watering or feeding in winter, just because it's winter.
📢 Observe Conditions, Not the Calendar
If you’re using:
- Grow lights
- Room temps above 20 °C
- Stable humidity
…then your plants are still in active growth. Cutting back on watering or fertilizer can cause nutrient deficiency or slow root activity — even in January.
But if your setup changes — like reduced light, cold nights, or low humidity from heating — then it’s time to adapt.
Environmental Changes That Do Require Adjustments
Condition |
Action |
|---|---|
Light drops, no supplemental LEDs |
Slightly reduce water and feed; monitor root activity |
Temperatures fall below 18 °C |
Watch uptake; reduce feeding if roots stall |
Radiators dry air or heat pots |
Wick systems and top layers help retain moisture |
Cold floors or window zones |
Elevate pots, insulate bases, or shift location |
Tap water is cold (<15 °C) |
Let it reach room temp before using |
💡 Cold roots = slow roots. Most semi-hydro issues in winter come from cold zones, not overwatering.
📌 Ongoing Care Tasks (Adjust As Needed)
Use these as guidelines, not rigid routines:
Task |
Frequency |
Notes |
|---|---|---|
Check reservoir level |
1–2× per week |
Top up or flush depending on uptake |
Observe new growth & roots |
Weekly |
Use root tips and leaf behavior to guide adjustments |
Flush substrate |
Every 2–3 weeks |
Especially important in fine substrates like Seramis |
Feed |
2–3× monthly |
See Section 6 for dilution and scheduling |
Wipe trays/pots |
Weekly |
Prevent biofilm near light exposure |
💡Real-World Setup Tips:
- Cold floors or underfloor heating: place pots on cork pads, trays, or stands
- Cold windowsills / external walls: move pots inward during cold months or add thermal barriers
- Radiator zones: keep pots 50+ cm away; use humidity-retaining top layers like sphagnum moss
- Cold water: always use room-temperature water for flushing and feeding (18–22 °C)
📌 Checklist: Adjust If You Notice…
Symptom |
What to Do |
|---|---|
Water sits for too long |
Lower reservoir, improve airflow |
Reservoir empties rapidly |
Increase monitoring, check light or heat |
Growth halts or stalls |
Check root health, review feeding schedule |
Leaves show tip burn |
Flush, reduce feed strength, reassess light |
Substrate surface stays soggy |
Lower humidity, raise pot or switch setup |
📌 Recap: Flexible, Not Seasonal
- Most tropical plants don’t stop growing unless their environment tells them to
- Seasonal care is only relevant if light, temp, or humidity drop
- Don’t copy “winter routines” — observe your space, your roots, and your reservoir
- Flush regularly and maintain hydration consistency year-round if your setup is stable
Stable grow lights + stable temperatures = stable growth. Don’t disrupt it with seasonal assumptions and advice taken from outdoor gardening.

8. Diagnosing Problems in Semi-Hydro – Root Rot, Yellowing, Drooping & More
Semi-hydro makes root systems more visible — but interpreting what you see still takes context. Drooping doesn’t always mean overwatering. Yellowing doesn’t always mean nutrient deficiency. And not all root loss is failure.
This section helps you spot problems early, understand what they mean, and decide what to fix (and what to leave alone).
💡 How to Use This Section
Start with the symptom you see and expand the relevant section. Then check the table for severity, likely causes, and what to fix.
🟡 = Monitor, no rush
🟠 = Needs adjustment
🔴 = Act promptly
❓ Should I Repot? Quick Decision Guide
Use this before touching the roots:
- Does the pot smell bad? → Yes → Repot
- Are roots black or mushy? → Yes → Repot
- Are roots clean but shrinking? → Melt — wait
- Is water clear, roots pale, no growth? → Flush + observe
💡 Still unsure? Flush first. You can always repot later — not the other way around.
📌 Summary: What to Fix — and What to Leave Alone
Fix it if:
- The reservoir smells sour or swampy
- Roots are visibly rotting
- Growth has stalled for 4+ weeks without improvement
- Salts are building up despite flushing
Leave it alone if:
- Roots are pale, firm, and odorless (even if old roots melted)
- The plant is pushing new growth but slowly
- Water usage is stable and predictable
💡 Want to optimize your container setup for passive hydration and minimal maintenance?
Read our full guide to self-watering pots for container comparisons, wick techniques, and the best pairings for semi-hydro systems.
9. Advanced Maintenance – When to Refresh, Repot, Reset or Scale
Semi-hydro can be stable long-term — if you know when to intervene and when to leave things alone. The biggest mistakes often come from overreacting: unnecessary repotting, stacking stressors, or using the wrong substrate too long.
This section walks you through when to refresh the top layer, when a full repot is needed, and when to hit reset — plus how to scale your setup without chaos.
❓ What Should I Do? Quick Triage
Use this flow to decide your next step:
- Substrate looks clean, water use is normal → Just flush
- Top layer dries fast, looks compacted → Refresh
- Roots are circling or compact → Repot
- Smell, rot, or slime present → Full reset
📌 Substrate Lifespan – When Media Needs Replacing
Substrate |
Lifespan |
When to Act |
|---|---|---|
LECA |
5+ years |
Rinse if slimy; replace only if foul |
Pumice |
Indefinite |
Rinse and reuse freely |
Seramis |
12–18 months |
Replace when crumbling or over-retentive |
Pon |
1–2 years |
Refresh when fines settle or airflow drops |
Lava rock |
5+ years |
Heavy but stable — rarely needs replacing |
Zeolite |
3–5 years |
Flush if salt builds up, or rotate between plants |
💡 Don’t replace substrate by default. If it still drains, wicks, and smells clean — keep it.

📌 Refresh vs Repot vs Reset
Scenario |
Action |
Reason |
|---|---|---|
Wicking slows but roots are healthy |
Refresh |
Restores flow without disturbing the plant |
Pot is root-bound or airflow drops |
Repot |
Improves structure, hydration, and access |
Foul smell, mushy roots, or biofilm |
Full reset |
Indicates bacterial failure or rot — clean out |
📌 How to Refresh Without Repotting
A safe maintenance routine for stable plants:
- Drain reservoir
- Remove top 3–5 cm of substrate
- Loosen surface gently if compacted
- Add rinsed, fresh media
- Top-water once to reactivate wicking
💡Do this every 6–12 months depending on plant and substrate.
📌 How to Fully Repot (Healthy Roots)
Repot when:
- Pot dries in <2 days
- Roots spiral tightly
- Water sits stagnant despite flushing
Steps:
- Remove gently — don’t pull
- Rinse roots with lukewarm water (18–22 °C)
- Repot into fresh, pre-rinsed substrate
- Top-water once
- Resume shallow reservoir the next day
- Wait 10–14 days before feeding again

📌 Full Reset – When Things Go Wrong
Do this only if:
- Substrate smells sour, swampy, or fermented
- Water is cloudy or sticky
- Roots are collapsing or black
- Organic fertilizer was used and bacteria took over
Steps:
- Trim away all mushy or rotten roots
- Disinfect the pot and rinse all parts thoroughly
- Use fresh, rinsed mineral media
- Start with wick or shallow water only — no deep reservoir
- Hold off on feeding for 2–3 weeks
💡Many resets are due to bacterial contamination — often caused by using soil or organic fertilizers in water-based systems. These break down and feed anaerobic microbes, leading to slime, biofilm, and rot.
📌 Root & Leaf Pruning Guidelines
Root trim only if:
- Rot is present
- Roots are tangled and airflow is blocked
- You’re downsizing the container
Leaf trim only if:
- Leaves are collapsing, yellowed, or dry
- You removed >30% of roots
💡Never remove healthy leaves “to reduce stress.” In semi-hydro, leaves help regulate hydration.
📌 Post-Repot Feeding & Recovery Timing
Action |
Feed Delay |
Setup Type |
Monitor For |
|---|---|---|---|
Refresh only |
None |
Normal reservoir |
Water use, root growth |
Full repot |
10–14 days |
Shallow reservoir |
New roots, no melt |
Reset + pruning |
14–21 days |
Wick or low water |
Root rebound, tip growth |
💡 One intervention at a time. Don’t repot, prune, relocate, and feed in one day.

📌 Scaling a Semi-Hydro Setup
As your collection grows, so do the logistics. These tips keep things manageable:
Tip |
Why It Helps |
|---|---|
Standard pot sizes |
Easier to flush, organize, and stack |
Label each pot |
Track substrate, plant, and dates |
Group by water uptake |
Schedule trays instead of individual pots |
Elevate all pots |
Prevent cold shock and stagnation |
Track flush/feed cycles |
Spot salt issues or neglect early |
📌 System Upgrades (Optional)
Setup Type |
Ideal For |
|---|---|
Wick-fed trays |
Cuttings, propagation, grouped plants |
Self-watering pots |
Larger aroids or high-demand species |
Capillary mats |
High-density racks or grow tents |
Flush trays with overflow |
>15 plants in one area |
📌 Recap – Long-Term Success Without Guesswork
- Refresh the top when wicking slows or airflow drops
- Repot only when roots demand more space or structure
- Reset only when the system has failed — smell, rot, or bacteria
- Rinse and flush more often than you feed
- Scale smartly by grouping, labeling, and tracking
- Never use soil-based or organic fertilizers — they’re a top reason resets are needed
10. FAQ & Final Wrap-Up – Your Semi-Hydro Reference Toolkit
Quick answers, with jump links to the exact sections they reference. Use this as your “bookmark” hub when you need a fast check mid-setup.
Q1: Can I grow all houseplants in semi-hydroponics?
Most tropical foliage plants (and some succulents with fleshy roots) adapt well. Skip plants that require very specific organic/acidic conditions (for example many carnivorous plants), or anything that truly relies on long dry cycles unless you’re building a highly customized mineral strategy.
Start here: Why Switch to Semi-Hydro and Custom Mineral Mixes by Plant Type.
Q2: How do I know if my plant is adapting or failing?
Watch roots and water use, not just leaves:
- Adapting: new pale hydro roots + stable or improving water uptake
- Failing: sour smell, slimy setup, collapsing crown, no new root tips after weeks
Use these sections as your checklist: Transition Guide and Diagnosing Problems.
Q3: Do I have to change the substrate every year?
No. Most mineral substrates last a long time. Regular flushing and occasional surface refresh usually handle salt buildup and fines settling. Replace only if media breaks down, stops draining/wicking properly, or the system stays “off” even after corrective steps.
Q4: Why is my semi-hydro plant not using water?
Common causes: cold roots, stalled adaptation, salt buildup, compaction/fines, or a reservoir level that doesn’t match current root length.
Start with a flush, then assess root behavior and conditions before repotting. Use: Diagnosing Problems and Daily, Weekly & Seasonal Care.
Q5: How often should I fertilize in semi-hydro?
If your nutrient label provides passive-hydro guidance, follow it. If not, a safe baseline is feeding every 2nd or 3rd watering, alternating with plain water to reduce salt buildup. Adjust by plant type, growth rate, substrate, and water quality.
Full framework here: Feeding & Flushing.
Q6: How do I restart a semi-hydro plant that’s declining or rotting?
Do a true reset: remove mushy roots, disinfect the setup, switch to fresh rinsed mineral media, and restart with low water (or wick-only). Hold off feeding for 2–3 weeks while new hydro roots form.
Step-by-step is in: Advanced Maintenance – Full Reset.
Q7: What causes plants to fail in semi-hydro the fastest?
Fastest failure triggers are usually preventable:
- Feeding too early (before hydro roots exist)
- Cold water / cold zones stalling root activity
- Repotting too often, breaking fragile new roots
- Stacking stressors (repot + prune + relocate + feed)
- Fertilizers with organic content causing bacterial overgrowth in the reservoir
Use these sections as guardrails: Transition Guide, Feeding & Flushing, and Advanced Maintenance.
Q8: Do I need to remove all the soil when switching to semi-hydro?
No. Remove most of it, but don’t obsess over every speck. Aggressive scrubbing damages fine roots and slows adaptation. If you want a “fully clean” root system, it’s often easier to do a more thorough rinse later, once the plant has already started producing hydro roots.
See the process: Transition Guide.
Q9: Can I use only LECA, or do I need to mix with Pon or Seramis?
LECA works, but wicking can be unreliable on its own—especially in smaller pots, shallow-rooted plants, or setups where the reservoir sits low. Mixing in finer media (Pon, Seramis, zeolite) improves capillary action and nutrient buffering for moisture-sensitive roots.
Compare options here: Choosing the Right Substrate and Custom Mineral Mixes.
Q10: How often should I flush the substrate?
Every 2–3 weeks is a strong default for most setups. Flush more often if you use fine substrates (Pon, Seramis), hard tap water, or feed frequently. If you see white crust or tip burn, flush sooner and reassess dosing.
Technique + timing: Feeding & Flushing.
Final Reminders – What Actually Matters in Semi-Hydro
1. Focus on Root Health, Not Just Leaves
- Semi-hydro success depends on stable, functional root systems — not glossy foliage.
- Root melt (pale, shrinking, odorless) is normal during adaptation.
- True root rot (black, mushy, foul-smelling) means it's time to reset.
2. Observation Beats Routine
- Don’t follow the calendar — follow your setup and environment.
- If humidity, temperature, and light stay stable, your plant stays in active growth year-round.
- Use root tips and water uptake as your main indicators — not seasonal advice borrowed from soil and outdoor garden care.
3. Keep It Simple and Consistent
- Flush every 2–3 weeks to prevent silent salt buildup.
- Fertilize lightly, not aggressively — overfeeding causes far more issues than underfeeding.
- Space out interventions: never prune, repot, relocate, and feed on the same day.
- If in doubt, flush and observe before taking drastic action.
That’s a Wrap!
You now have a complete, myth-free, fact-based guide to transitioning, maintaining, and scaling semi-hydro houseplant care. Whether you're keeping one Anthurium happy or juggling 30 Hoyas in Pon — you’re equipped.
🪴 Happy growing — and remember: let the roots tell you what to do.
Sources & Further Reading
For readers interested in the science behind semi-hydroponics, root adaptation, and mineral nutrition, the following sources offer reliable, research-based information. These references support the care practices outlined in this guide and provide a solid foundation for further learning.
-
Thakulla, D., Dunn, B., & Hu, B. (2021). Soilless Growing Mediums. Oklahoma State University Extension Fact Sheet HLA-6728
Compares inert hydroponic media like expanded clay, perlite, etc., including their cost, pH, and reusability.
-
Pinkerton, M., Whitman, B., Eason, H., & Gomez, C. (2021). Common Media Used in Hydroponics. University of Florida IFAS Extension, Publication #ENH1359
Overview of physical properties of soilless media – e.g. pore space, water-holding, aeration – and common substrates such as coco coir, perlite, pumice, expanded clay.
-
Shrestha, A., & Dunn, B. (2017). Hydroponics (HLA-6442). Oklahoma State University Extension.
General introduction to hydroponic systems; discusses passive wick systems that rely on capillary action to draw water to plant roots and compares soil vs. hydroponic growth.
-
Treftz, C., Kratsch, H., & Omaye, S. (2015). Hydroponics: A Brief Guide to Growing Food Without Soil. University of Nevada, Reno Extension, FS-15-08
Explains hydroponic techniques including subirrigation; notes that in passive systems, a porous medium transports nutrient solution to roots via capillary action.
-
Semananda, N. P. K., Ward, J. D., & Myers, B. R. (2018). A Semi-Systematic Review of Capillary Irrigation: The Benefits, Limitations, and Opportunities. Horticulturae 4(3)
Literature review of capillary watering methods – wicks, mats, ebb-and-flow – finding they improve water efficiency and yield for container-grown plants, especially ornamentals, by evenly wicking moisture while reducing leachate.
-
Dhanraj, D. (2020). Performance of Foliage Ornamentals in Hydroponic Nutrient Solutions. Journal of Floriculture and Landscaping 6(1): 9–13
Study demonstrating growth of common indoor foliage plants in passive hydroponic setups, measuring root length and plant performance under different nutrient solution regimes in soilless culture.
-
Pinkerton, A. (2023). Mineral and Fertilizer Salt Deposits on Indoor Plants. University of Maryland Extension
Advises leaching accumulated fertilizer salts by periodically flushing inert growing media with large volumes of water; warns that bottom-wicking without periodic top-flushing can lead to salt buildup that causes leaf burn and root desiccation
-
Leaching Salts from Potting Mixes. (2017). PlantTalk Colorado™ – Colorado State Univ. Extension (Fact Sheet #1339)
Discusses diagnosing salt stress in potted plants – white crust on medium, leaf burn, wilting despite moisture – and provides a method to flush excess soluble salts from the root zone by thorough top watering
-
Amrhein, J.J., Rotondo, F., Kubota, C., Miller, S.A., & Testen, A.L. (2025). Diagnostic Guide for Pythium Root Rot in Hydroponic Leafy Green and Herb Production. Plant Health Progress.
Current peer-reviewed guide to identifying and managing root rot in hydroponic systems — excellent root health reference.
-
Williams-Woodward, J. (2022). Root Disease Management in Hydroponic Systems. e-GRO Alert E706.
Extension publication summarizing sanitation, prevention, and system design for managing root pathogens in hydroponics.
-
Palande, V., Zaheer, A., & George, K. (2018). Fully Automated Hydroponic System for Indoor Plant Growth. Procedia Computer Science, 132, 1143–1150.
Engineering-focused study describing passive and active hydroponic systems in controlled indoor environments.
-
Cerro, C. (2022). Future of Dwelling: Indoor Plants and Produce. American University of Sharjah – WIT Sustainable City Conference.
Explores the integration of hydroponic plant systems in indoor living spaces and architectural sustainability.
-
Nguyen, N.T., McInturf, S.A., & Mendoza-Cózatl, D.G. (2016). Hydroponics: A Versatile System to Study Nutrient Allocation and Plant Responses to Nutrient Availability and Exposure to Toxic Elements. Frontiers in Plant Science / PMC5091364.
Explains how passive hydro systems facilitate nutrient uptake research; supports substrate and EC/TDS monitoring discussion.

